First, there was Everpix. Everpix was the first photos-in-the-cloud solution that I subscribed to. Everpix was really great, and I really liked it. It folded in 2013.
Next, Picturelife. Picturelife promised to be Everpix by a different name, and I’ve been using it for a couple years now. I really like Picturelife, but the site has been down for weeks, after an acquisition that had its own bumps. It seems obvious, despite claims to the contrary, that Picturelife is folding.
After hearing great things about it from Bradley Chambers among others, I decided to give Google Photos a try about a week ago.
There is much to like.
Search is impressive, and fast. I can type in beach 2014 and pictures from
our family’s beach trip in 2014 come up nearly instantly. I haven’t tagged these
photos explicitly; Google’s algorithms have inspected them, determined they are
photos taken at a beach, and looked at the EXIF data to see they were
taken in 2014. (To be fair, these photos do have a latitude and longitude.)
Even more impressive, I can ask for london, and sure enough, pictures we took
during our vacation in 2010 show up. I find this to be particularly impressive
because these photos were taken on a point-and-shoot camera. Google has
almost nothing to go on: no geolocation. No descriptive filename. No descriptive
path name on the source computer. I’m honestly not sure how these pictures were
associated with London. The more I think about it, the more I’m impressed.
I have mixed feelings about Google Photos’ Assistant. Over time, Google Photos will attempt to make collages and animations out of your photos. When one is created, it will be shown in the Assistant tab. Sometimes, this is really awesome:
You guys were right about Google Photos: pretty good. This was auto generated from stills. pic.twitter.com/1ImWNWhWju
— Casey Liss (@caseyliss) May 6, 2016
The problem I have with Assistant is that it is really chatty. I feel like I’m seeing 20+ cards in the Assistant tab each day. It feels odd to complain about that, but it does get to be a bit overwhelming. I can turn them off, but to do so I’d lose out on the gems like the one above.
Uploading the majority of a ~200 GB library took around 2 days on my 75 Mbit FiOS connection. Google Photos leverages Google Drive for storage. Thus, Google Drive pricing is applicable. For me, I need to pay for 1 TB, which costs $10 monthly. This is $5 cheaper than Picturelife was.
Interestingly, if you’re willing to store compressed versions of your images, you can have unlimited space for free. Very impressive.
I do miss some things about Picturelife.
My favorite feature of both Everpix and Picturelife were the Timehop-style “this day in” emails. Each day, I would receive an email with pictures that were taken in that day in prior years. For today, I’d see pictures taken 9 May 2015, 9 May 2014, etc. Google Photos doesn’t have any such feature, though I can do a search each day. I’m told by Bradley that there is an Assistant feature that will accomplish this for me, but it doesn’t seem to be enabled on my account. Perhaps it will be after more time.[1]
I also wish that I could find photos by means other than search. For example, in Picturelife, there is a map view that will let you pan and zoom and show you where pictures were taken. So, for example, I can zoom into a family member’s house to see what pictures we’ve taken there.
I’m not sure how to do the same on Google Photos. Searching landmarks like
London is easy. Even searching for BMW works. But I’m not sure how to search
for “my brother in law’s house”. Arbitrary addresses don’t seem to work either.
Finally, I really like having a web component I can use to find and download pictures. On the surface, Apple’s iCloud Photo Library should be a natural solution for an all-Apple house like ours. However, I really like having access to our photos via the web. I don’t like to rely on Photos, as I’ve never found it to agree with me. Furthermore, I trust Google to get this sort of cloud service right far more than I trust Apple.
By and large, I’m very happy with Google Photos so far. Search is the work of magic, and is nearly instant. The Assistant has its warts, but does come up with some really great auto-generated photos and movies. The service is cheap, and I can upload full-resolution pictures to it.
If you’re looking for a cloud-based photo management solution; I recommend Google Photos.
But then again, I recommended Picturelife, and Everpix before it. Fingers crossed Google can hang on longer than them.
UPDATED 14 May 2016 7:45 AM: Today, ten days after subscribing to Google Photos, I got asked if I wanted to enable the “Remember this day” assistant. Additionally, the assistant has gotten far less chatty, now that is has seemingly processed my bulk upload. ↩
I mentioned in Poor Apple Watch that I had picked up a super cheap knockoff Space Black Milanese Loop from Amazon. I paid $18 for it; as I write this, it’s currently listed at $21. The official Apple version is $200.
There are a couple things that bother me about the Penom (knockoff) Loop. The color match against my Space Grey Apple Watch Sport is poor; this is most obvious in the lugs. There are a couple of spots where silver/unpainted stainless steel show through. It’s also a bit longer than I’d like, though I have small wrists. (I wear the smaller of the 42mm Sport Bands in the middle position).
Today, I went to the local Apple Store and tried on the official Milanese Loop. I was expecting to be blown away by the improved build quality; I expected it to be obvious which one was Apple and which one wasn’t.
Blindfolded, I doubt I could tell.
The color match on the Apple Milanese Loop is considerably better. Otherwise, the two felt about the same. The Apple one did feel marginally nicer, but not nice enough to justify spending 10x the money.
With this pleasant experience behind me, I’ve been eyeing up black link bracelet knockoffs on Amazon. I linked this one previously, but it requires a tool to add or remove links. Since posting Poor Apple Watch I’ve found another one that doesn’t require a tool to add or remove links, just like the official Apple Link Braclet. I’m seriously tempted to try it, but the $120 price tag is over my impulse purchase threshold.
Then again, that’s roughly a quarter of what Apple wants…
There has been some varied chatter over the last couple days about what can be done regarding WWDC. For those that aren’t familiar, WWDC is Apple’s annual developer event that happens in San Francisco every June. It’s where the new version of iOS is announced, and developers can attend sessions and labs to learn about these features.
I’ve gone every year for the last several; my first WWDC was in 2011.
There has been increasing angst each year as two things happen: tickets become harder to get (though the lottery seems to have leveled the playing field), and hotels get ever more expensive. I’ve stayed at the same hotel for the last three years. My final bill each year is as follows:
| Year | Bill (USD) |
|---|---|
| 2013 | $1123.46 |
| 2014 | $2036.58 |
| 2015 | $2043.70 |
| 2016 | ~$2500 |
Naturally, I haven’t paid the 2016 bill yet, but that’s what my reservation has me down for.
This is a 225% increase since 2013. For the same hotel. One that is roughly 5 blocks from Moscone. Yikes.
This $2500 hotel room is on top of the $1600 conference ticket, if I’m lucky enough to win one. So my hopeful WWDC trip starts at $4000, and I haven’t flown there yet. Flights from the nearest large airport are roughly $500 round trip.
I’m looking at $4500 and I haven’t yet eaten anything outside of the Apple-provided breakfasts and lunches.
For so many of us—most of us—this is a non-starter. Hell, I could buy a car for that kind of money.
So what can Apple do?
There was some Twitter chatter about this, and Charles Perry had the same idea I had been kicking around:
@parrots @manton2 It would be interesting to see WWDC in Las Vegas. Easy to fly to, lots of venues, & most importantly lots of hotels.
— Charles Perry (@DazeEnd) April 20, 2016
Vegas seems like the obvious answer, for all the reasons Charles laid out. Unfortunately, I don’t think WWDC can ever really move away from San Francisco.
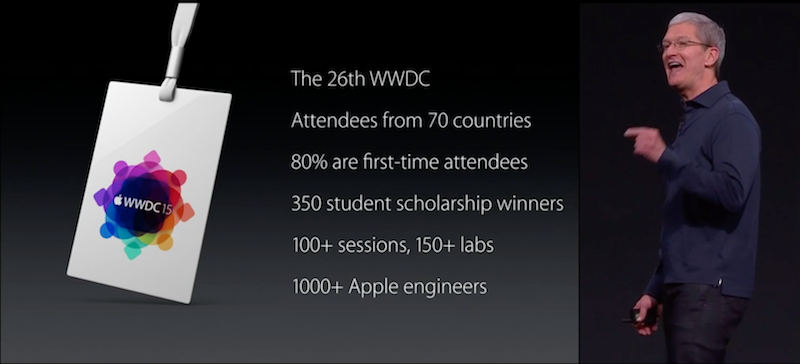
As Tim Cook tells us during every WWDC keynote, Apple generally sends around a thousand developers to speak, work the labs, and be available to developers. To move all of them to Vegas is a tremendous burden. The burden isn’t just financial, either. Quite obviously, Apple has enough money to charter some very nice airplanes to fly from SFO to LAS.
Moving all those engineers would mean more than just moving 1000 bodies to Las Vegas. It would also mean disrupting the lives of 1000 families. Which is a considerably larger burden to bear.
WWDC is not perfect. It’s announced frustratingly late for American travelers, and uncomfortably late for foreign ones. It’s expensive, and exclusive. People doubt its worth every year. As do I. But every year, I hope to be lucky enough to make it back. When it’s all over, I’m always glad I’ve participated.
I really love my new Apple TV. Though I only have a handful of apps on it, they’re wonderful. (I’m looking at you, Plex and Netflix.) I find that our new Apple TV is on considerably more than the one it replaced.
The one thing the new Apple TV is missing for me is optical output. I have a peculiar AV setup—one that I’m not looking to change at the moment—and a lack of optical output is a real bummer.
Suffice it to say, the Apple TV is connected to my TV directly via HDMI, and then the TV pipes audio back to the receiver via optical. That means I cannot listen to the Apple TV without the TV on. I discussed this in more detail on ATP.
Often times, I want to hear my Apple TV, but I don’t want to see it. AirPlaying music is a common occurrence around the Liss household. Be it from Spotify or iTunes Match, no matter what there is no video to display.
Given we have little eyes in the house, we try to keep the TV off as much as possible while he’s running around. We also like to have music on constantly. What I really needed was a way to get the audio carried on the HDMI out of HDMI and onto optical. I already had an optical port on my receiver dedicated to the old Apple TV; all I wanted was a way to drive it.
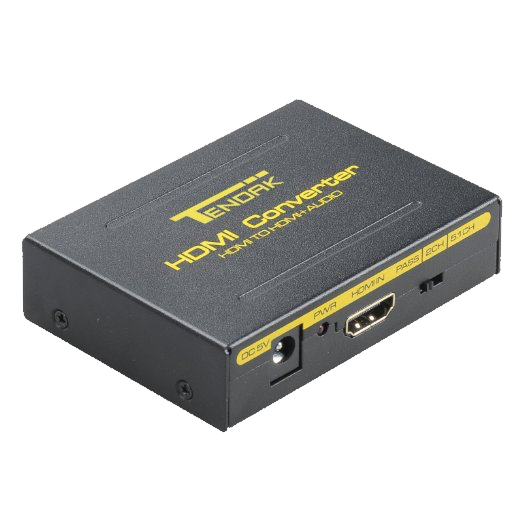
Around the time the Apple TV came out, I stumbled on the Tendak HDMI Splitter which appeared to do exactly what I want. I finally got one and set it up this weekend. The Tendak serves as both a HDMI passthrough (for continued/normal video operation) as well as splitting off optical audio. At the time of this writing, it’s around $30[1]. If RCA is your thing, the Tendak provides RCA outputs as well.
Regardless, the Tendak does the trick, and does so for half the cost of this alternative Kanex Digital Audio Adapter. The Kanex is considerably prettier, doesn’t appear to have an annoying red power LED, and appears to be far smaller. However, the Kanex is also nearly double the price.
My setup is odd, but the Tendak has given me back what the fourth-generation Apple TV took away: ability to play audio without the TV being on.
My only gripes are the bright red power LED, and that the box is physically setup as a passthrough. HDMI enters one side and comes out the other. In my setup, it would have been far more convenient to have all the inputs and outputs on one side of the Tendak. I’d also love for it to run off the power on the HDMI cable, but I know that’s a bit much to ask.
I should note there seem to be many equivalent devices for sale on Amazon from different brands, so another brand may be slightly cheaper. Your mileage may vary. ↩
Increasingly, I feel like I’m the only one.
I still really like my Apple Watch.
Many of my friends and peers seem to be getting rid of their Apple Watches. They’re either no longer wearing watches at all, or are switching to mechanical watches instead. I can’t help but feel like it’s trendy to be smug about the Apple Watch.
I last discussed my thoughts about the Apple Watch in December. I wrote then:
Insignificant as [receiving notifications on your wrist] may seem to be, it actually isn’t. The Apple Watch has allowed my iPhone to transition from being a personal device to being a private one. That’s a really profound change. More so than I expected.
I feel that exact same way today.
Thinking of the Apple Watch as a standalone device that replaces the functionality of your phone is a fool’s errand. The Apple Watch improves your visibility into what is happening in your phone, like a satellite giving you a bird’s eye view of the earth. Neither will give you great detail about what is happening, but either can give you a lot of general information very quickly.
The Watch does its best work when it is showing notifications, allowing hyper-terse replies to messages, or showing you little snippets of data by way of complications. It does not do well as a standalone platform for applications.
And you know what? That’s okay.
Perhaps it’s because I have a job where I leave the house, but I can’t imagine looking down at my wrist and not seeing when my next appointment is. I can’t imagine looking down and not seeing what the temperature is outside.
I find it very convenient to see the weather forecast on my watch, even if my phone is on my desk upstairs. If my phone is across the house, I can decide by my wrist whether the call I’m receiving is worth sprinting to my phone for. I can glance at a text message while I’m driving, and see if it’s worth pulling over to take a closer look at; or I can reply easily and quickly with my voice.
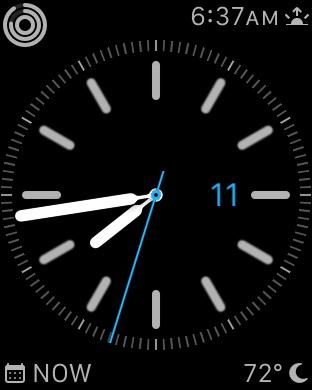
I understand why one would give up on the Apple Watch. The apps are, by and large, useless. The glances are nearly as bad. But custom complications have changed how I think of my Apple Watch. Complications have turned my Watch into an information appliance.
For others, that may not be the case. And you know what? That’s okay too.
So many are lamenting the slow speed of the Apple Watch. I can’t argue; it annoys me as well. While I’d love to have increased performance in the next version of watchOS, and I’d love to see the next version of the Apple Watch get a little faster and thinner, I don’t feel like I need either of those things.
I could sure use custom third-party watch faces though.
I’ve found another reason to keep my Apple Watch around just in the last few weeks. I had heard many people telling me that Amazon has a ton of third-party watch bands, but was too scared to try them. The prices on these bands are unfathomably low as compared to the Apple equivalents, but wasting $20 is still wasting $20.
That in mind, I really wanted to try a Milanese Loop once Apple’s Space Black loop debuted. I didn’t want to spend $200 to do so. I found this knockoff on Amazon for around $20. I’ve been wearing it for a couple of weeks now and I quite like it. The color doesn’t perfectly match, and there are a couple of spots where silver peeks through. But for one tenth the cost, I’m a happy camper.
I’ve been eyeing this link bracelet for a while now, but ~$100 is too much for me to try on a lark. Whether I pull the trigger or not, it’s awesome to feel like I have so many options.
The beauty of the Apple Watch is that changing bands is super easy, and just when I was getting bored of my black Sport Band, I discovered a whole new world of bands, ripe for the picking. My Apple Watch may not look any different, but I can already tell the bands will be ever-changing.
My good friend and prolific iOS app developer _David Smith has released another new app. This one, Activity++, shows you your activity history that your Apple Watch has gathered. Sure, the Activity app does the same, but Activity++ is a vast improvement.
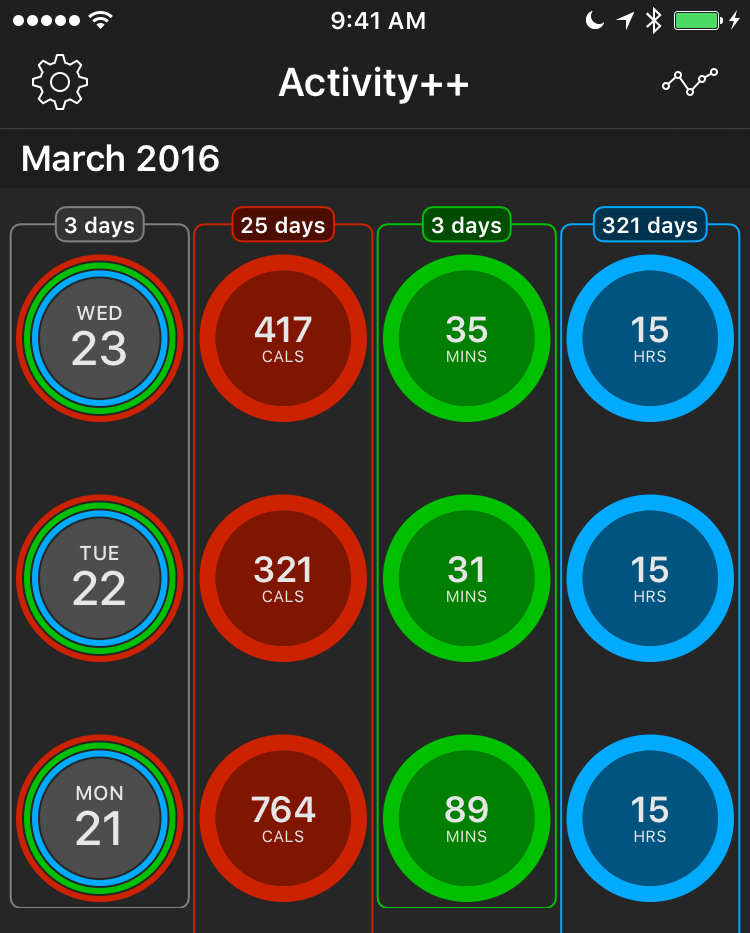
The app is a long list of your days, from most recent to least recent, stacked vertically. What I really love about the app are the statistics it shows. In the main screen, you can see how long you’ve maintained a run of one of your circles. In the example above, the last three days running I’ve hit all three goals; the last 25 I’ve hit my move goal, the last 3 I’ve hit my exercise goal, and the last 321 I’ve hit my stand goal.
I am the Blue Ring Stud, after all.
Tapping on any of these circles causes this awesome animation to happen:
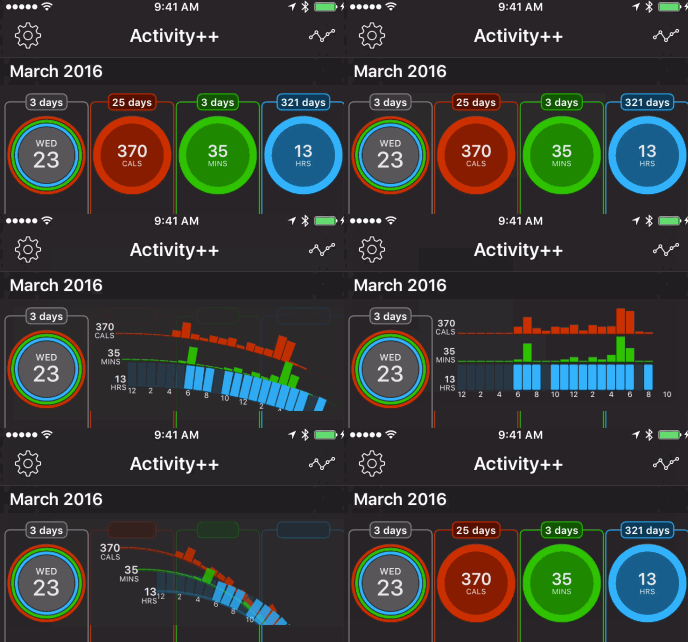
I could watch it all day.
Furthermore, there’s a statistics screen that shows you even more about how you’re doing:
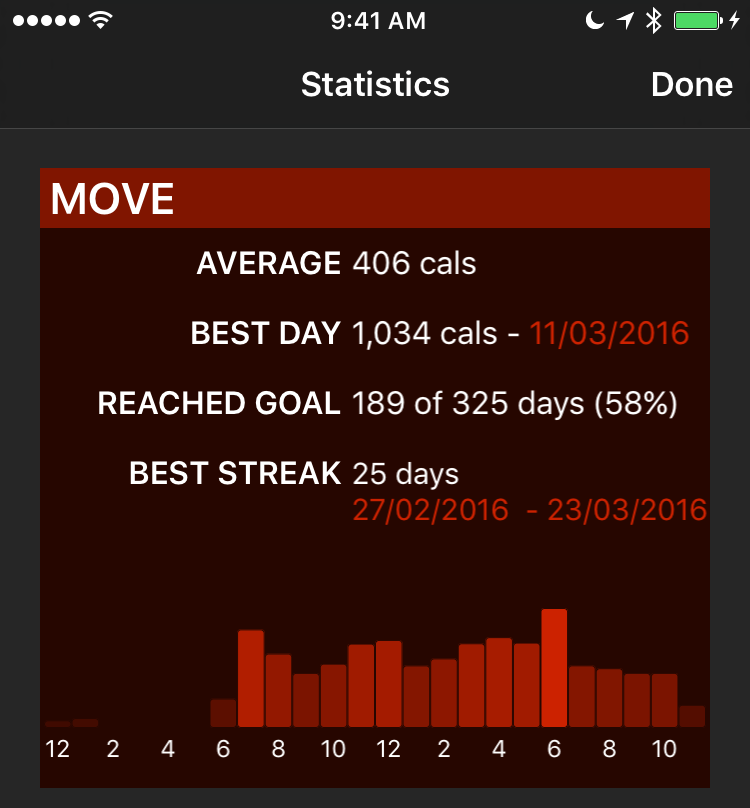
Not stopping there, David added one other great feature: “Rest Days”. If you’ve reached your goal for six consecutive days, one missed/rest day will not stop your streak.
Before you claim my Blue Ring Stud status is a farce, I will note that even without rest days, I had a 251-day streak. Damn you, flights back from the west coast.
As a final note, Activity++ also includes a handy Watch complication that makes it super easy to see the current state of your three goals, as a bar graph.
Activity++ makes your health data easy to digest, and your statistics quick to find. I’ve found this is already encouraging me to do anything I can to keep my streaks alive.
David is a dear friend, but I’d recommend Activity++ highly even if he wasn’t.
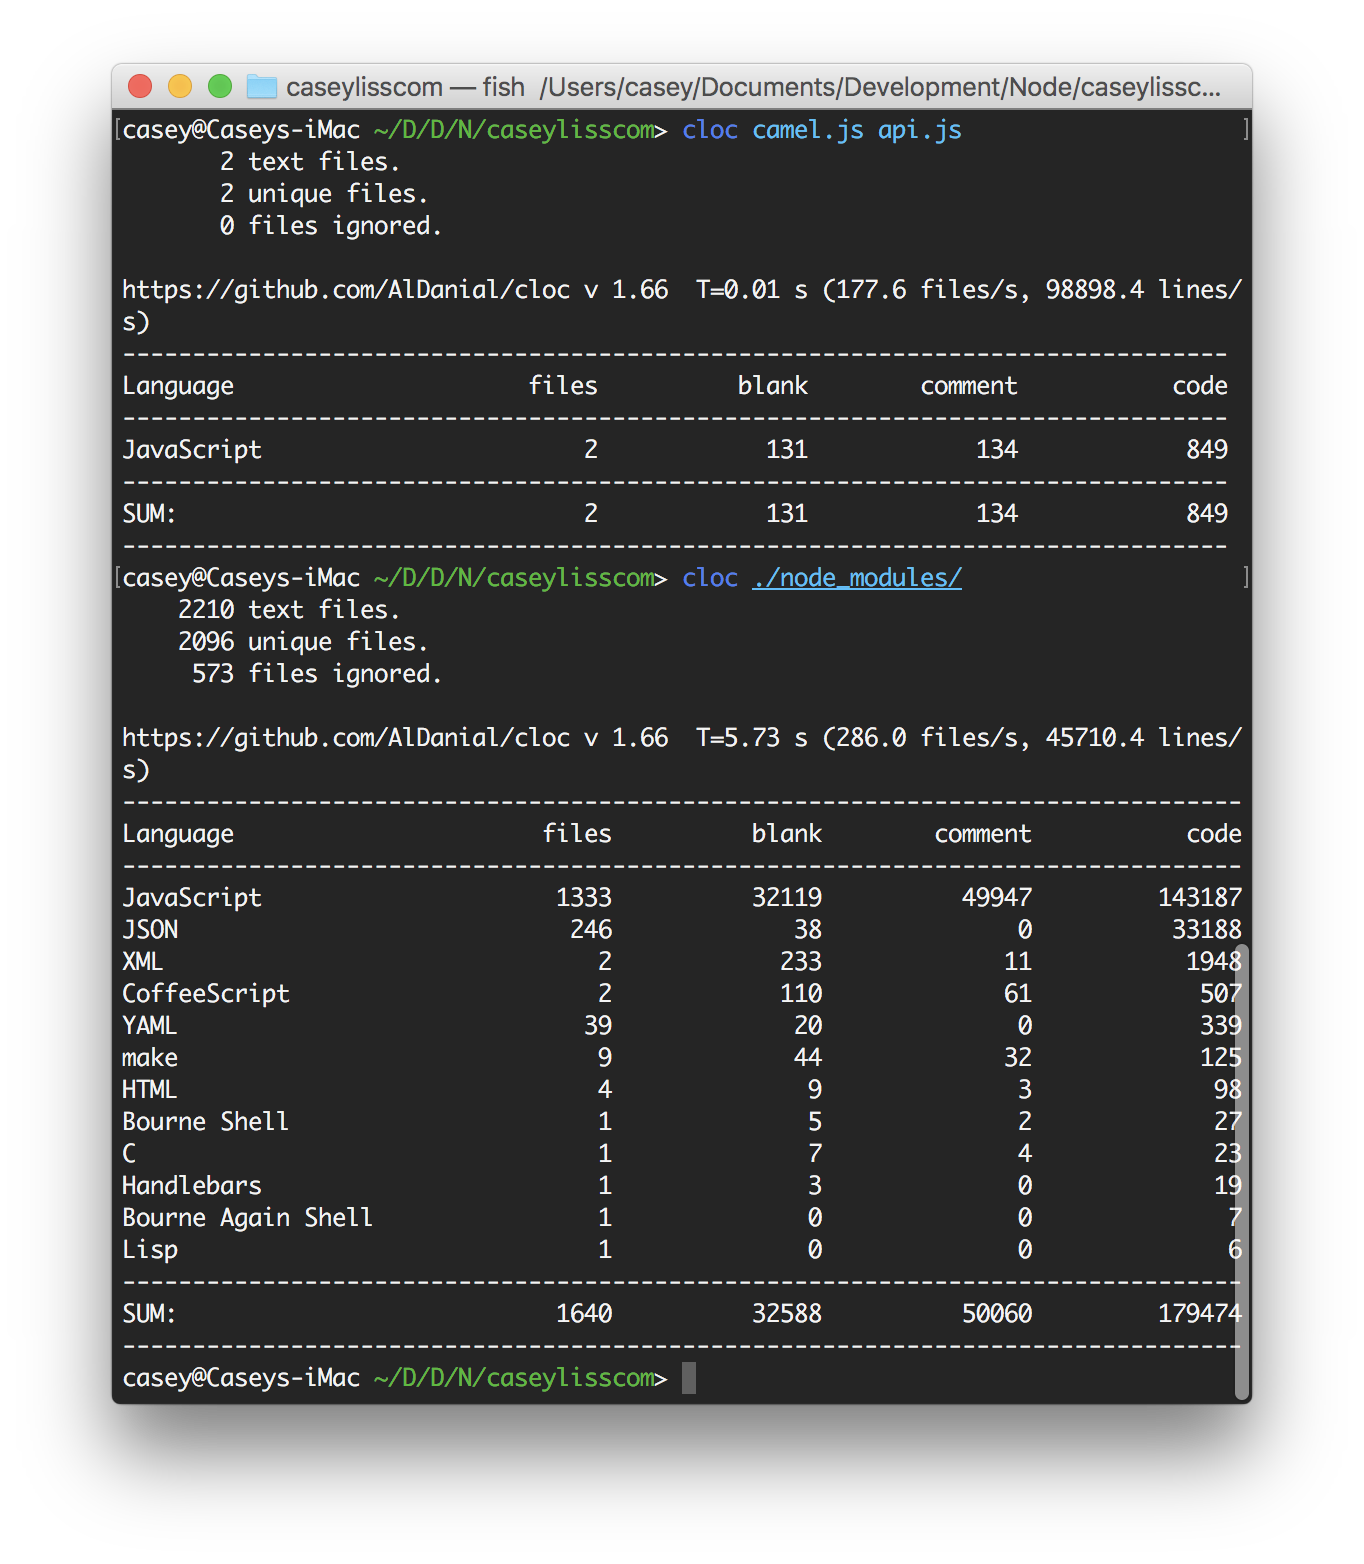
Camel itself is around 900 lines of code.
It takes nearly 200,000 lines of dependencies.
I like Node.js quite a lot, and I plan to stick with it for this blog for the foreseeable future. However, I can’t help but question my own choices.
Today I joined Christina Warren, James Thomson, and Dan Moren on this week’s Clockwise. As always, four of us, four tech topics, less than 30 minutes.
This week’s episode included the appeal (or not) of Apple News, how social media and forensics could have dramatically changed high-profile court cases, ways to intertwine the real and virtual worlds, and whether or not we would appear on the show Techno-Hoarders.
I always love to do Clockwise, as it’s so different from every other show I’ve been on. Do give it a listen.
It is an impossible task to describe what being a parent is like. That doesn’t stop me from trying though.
Yesterday, on a flight back home from a trip to Las Vegas, it occurred to me how different my life is now that I’m a father.
Once you become a parent, every time your plane jostles, you freak out. You suck your breath in. You hold on tighter, as if that will somehow keep you safer, in your flying tube, 35,000 feet up.
Every time there’s a sudden shift, you take stock. The extra life insurance you wanted to look into but completely forgot about? You remember it now. Your will that you know you should write but haven’t yet? You kick yourself for it.
It’s not that things didn’t matter to me before. It’s not that I don’t care about Erin. I have the utmost confidence Erin would be fine. In fact, I also know that she’d be fine raising Declan by herself.
But she shouldn’t have to. That’s what keeps me up at night.
That’s what makes me uncomfortable flying. The uncertainty, the lack of control, and the fear. The fear that I’ll leave them alone, bewildered, and with a pile of new problems. A mountain of messes to clean up that they didn’t make, and they don’t deserve.
That’s what being a parent is like. At least, that’s what it’s like on a turbulent flight across the country, in an eery grey fog, with everything you care about in the world on the planet thousands of feet below you.
Oklahoma high school teacher Steven Wedel writes an absolutely scathing open letter to local lawmakers and voters. Much of it rings true in other states. As the husband of a teacher, I know this all too well.
…[politicians] keep passing mandates to make us better while taking away all the resources we need just to maintain the status quo. We fear that our second jobs will prevent us from grading the papers or creating the lesson plans we already have to do from home. We fear our families will leave us because we don’t have time for them.
It tears at my heart to know that my best teacher cries over the dilemma she’s facing right now. She loves her job, but she’s afraid she can no longer afford to continue in this profession. It’s something we’re all dealing with. How far will you push us?
Not only do we not pay teachers an appropriate salary, we steadfastly refuse to fund our schools appropriately.