This week I was a guest on Collin Donnell’s The Run Loop. I’ve recently started listening to The Run Loop; it’s a great interview show with various developers in our community—and not just the ones most of us already know.
On my episode, Collin and I talked about QBasic, the live episode of ATP, a surprising amount about software methodologies, and, of course, RxSwift. It’s nice to stretch my legs and get really nerdy from time to time; this was one of those times.
Imagine you’re in your freshman year of college. You’re really into cars, and have been your entire life. Your wallet is poor, but your clock is rich. You enjoy BMWs—from afar—and have a favorite. That favorite is the E39 M5. One that you still dream of all these years later.
Out of nowhere, BMW releases a long-form commercial short film. Moreover,
it’s the first film in a series. A series called The Hire. That film,
Ambush, was directed by John Frankenheimer, a famous movie director.
If you look closely, you can see the advertising peeking through the film. To my eyes, the clear highlight is the BMW 7 series’ superior lights. In addition to, of course, it being an Ultimate Driving Machine. Despite these clear marketing ploys, I found the film to be just plain fun.
New films—dubbed “BMW Films”—were released every couple weeks. I waited for them like I waited for a new album from a favorite artist. I couldn’t get enough of The Hire.
What’s more, with each passing film, a new car was featured. It began with the aforementioned 740i, and continued in Chosen with the 540i—ever-so-close to my beloved M5. Next, The Follow with a mostly unremarkable 328i and then-still-impressive Z3.
Then came Star.
Directed by Guy Ritchie, and featuring his then-wife Madonna,
Star was is everything I’ve wanted from about 7 minutes of film.
Though it is a totally fun film, with a surprising amount of story for
its short duration, there is one primary reason why I love it so much:
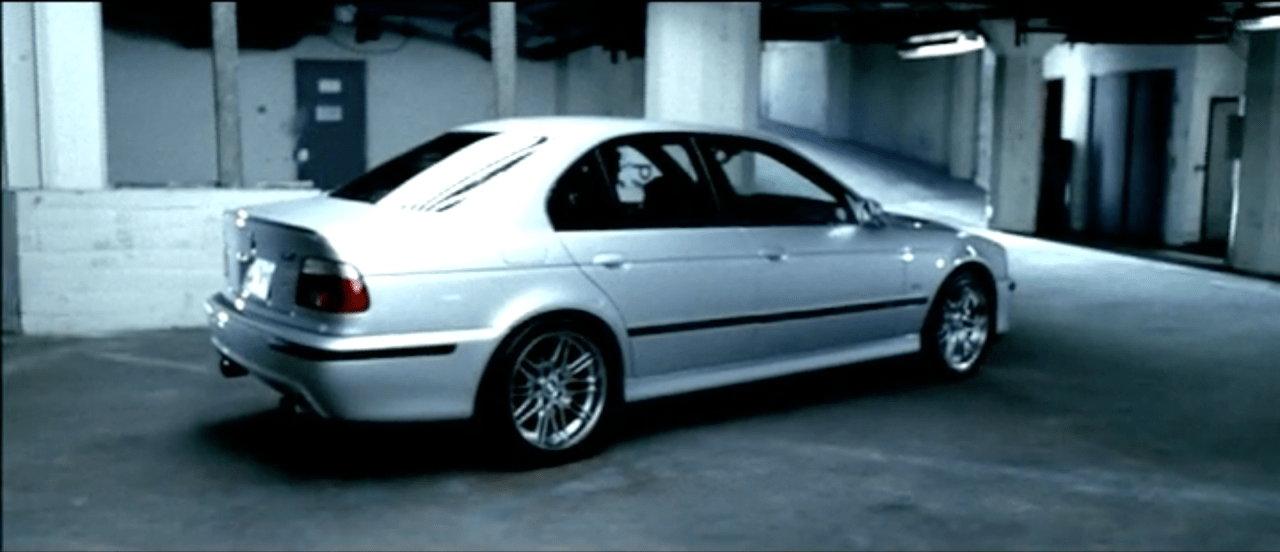
Guy Ritchie chose well. He chose the E39 M5. My favorite BMW, ever.
Things only got better from there. If you haven’t seen the film, you should stop here and just go watch it. Go ahead, I’ll wait. I didn’t embed it here for a reason: you should watch it full screen, 480i be damned, and watch it loud.
Do you see what I’m talking about‽ You know things are going to get interesting when the first few chords of Song 2 begin. However, this shot removes all doubt:
Imagine me, car-obsessed, in my early 20s, watching this for the first time. Now, imagine me watching it over and over and over again. Because that’s exactly what I did.
BMW ended up doing a second season of The Hire, but this time, instead of featuring various cars, they only featured the then-new Z4.
Of the second season, my favorite is far and away Ticker, written and directed by Joe Carnahan. Biases aside, it is probably the best of all the BMW Films. The audio direction in the opening, in particular, is so well done.
However, nothing can beat Star.
After the second season was completed, BMW actually offered a The Hire DVD anthology. For something like $10 shipping, BMW would send you a DVD with [almost] all of the BMW Films on it. Despite being a broke college student, I did exactly that. I still have the DVD to this day, and it is probably my most cherished DVD.
Last year, in 2016, BMW actually resurrected the BMW Films brand for their new 5 series sedan. The star of the series, once-unknown but now-famous Clive Owen, even reprised his role as the anonymous driver. While definitely in the spirit of seasons one and two, I can’t help but feel like The Escape just doesn’t quite have that joie de vivre that seasons one and two did.
The BMW Films did something that had previously only been accomplished by The Price is Right: they made a long-form commercial fun to watch.
I chose The Hire as my first things I like post for a reason. In the last week, Apple unveiled a short film about Siri that they filmed with The Rock. In every measurable way, I should have hated it. Yet, perhaps in part because of The Hire, I couldn’t help but enjoy it.
I doubt there’ll ever be a series of long-form commercials that are done with the respect and care that The Hire was. Nevertheless, I will forever hold those films as some of my favorite car-related videos ever.
Last week, I spent a couple hours at my company’s monthly hack day doing something I’ve never done before: contributing to open source.
I’ve spoken a lot about RxSwift in the past. Functional reactive programming is my new favorite thing, and I’ve been loving using it—both at work and on a personal project I’m fiddling with. One of the many nice things about RxSwift is that it’s very easy to extend it with new functionality.
During the course of my work, I noticed I wanted to be able to do something that
RxSwift didn’t support. The thing I wanted to do was very similar to something
that did exist, but not exactly the same. So, I wrote an extension in my
codebase. Then it occurred to me, why not contribute this to RxSwift itself?
So I did.
That pull request, small as it may be, was accepted! So, I can now honestly say “I’m a [very small] contributor to RxSwift”.
Pretty cool.
My mother doesn’t believe in reincarnation. Despite that, she’s long joked that if she were to come back again, she’d want to be some sort of musician. “I just want to know what it feels like to step on stage and have all those people excited to see me. How incredible must that be? How amazing must that feel?”
Back in 2014, I sort of had that opportunity. Last month, I largely realized my mother’s dream. My ATP co-hosts and I recorded an episode in front of almost 1000 fans. Nearly a thousand people, all there to see us. Cheering for us. Singing our theme song to us.
My life is weird, and I’m so thankful for it.
To all of you who listened, thank you! To all of you that showed up, thank you! It was a once in a lifetime experience.
The fine folks at AltConf were nice enough to host us. For
John and I, the experience was amazing. We showed up, spoke, and
then left. (In retrospect, I missed my opportunity for a truly obnoxious
rider.) Poor Marco, however, had to cart a suitcase full of
equipment across the country, set it up by himself set it up with
Stephen (before Stephen had to run to his own event!), and take it
back down all by himself.
As an added bonus, the fine folks at Realm recorded video of the event, and it’s now available! You can see the three of us in all our [likely awkward] glory. Realm did a great job with the video—as they always do—and I’m super thankful they put it all together.
I’m so thankful for both ATP and Analog(ue). I have no idea if they’ll last for another month or another decade. While they’re still a thing—while I’m still a thing—I’m riding this wave. For as long as I can.
UPDATED 3 June 2017 2:00 PM: Marco corrected me and pointed out that my dear friend Stephen Hackett actually helped out quite a bit with setup. My bad. 😔
So, here’s the thing.
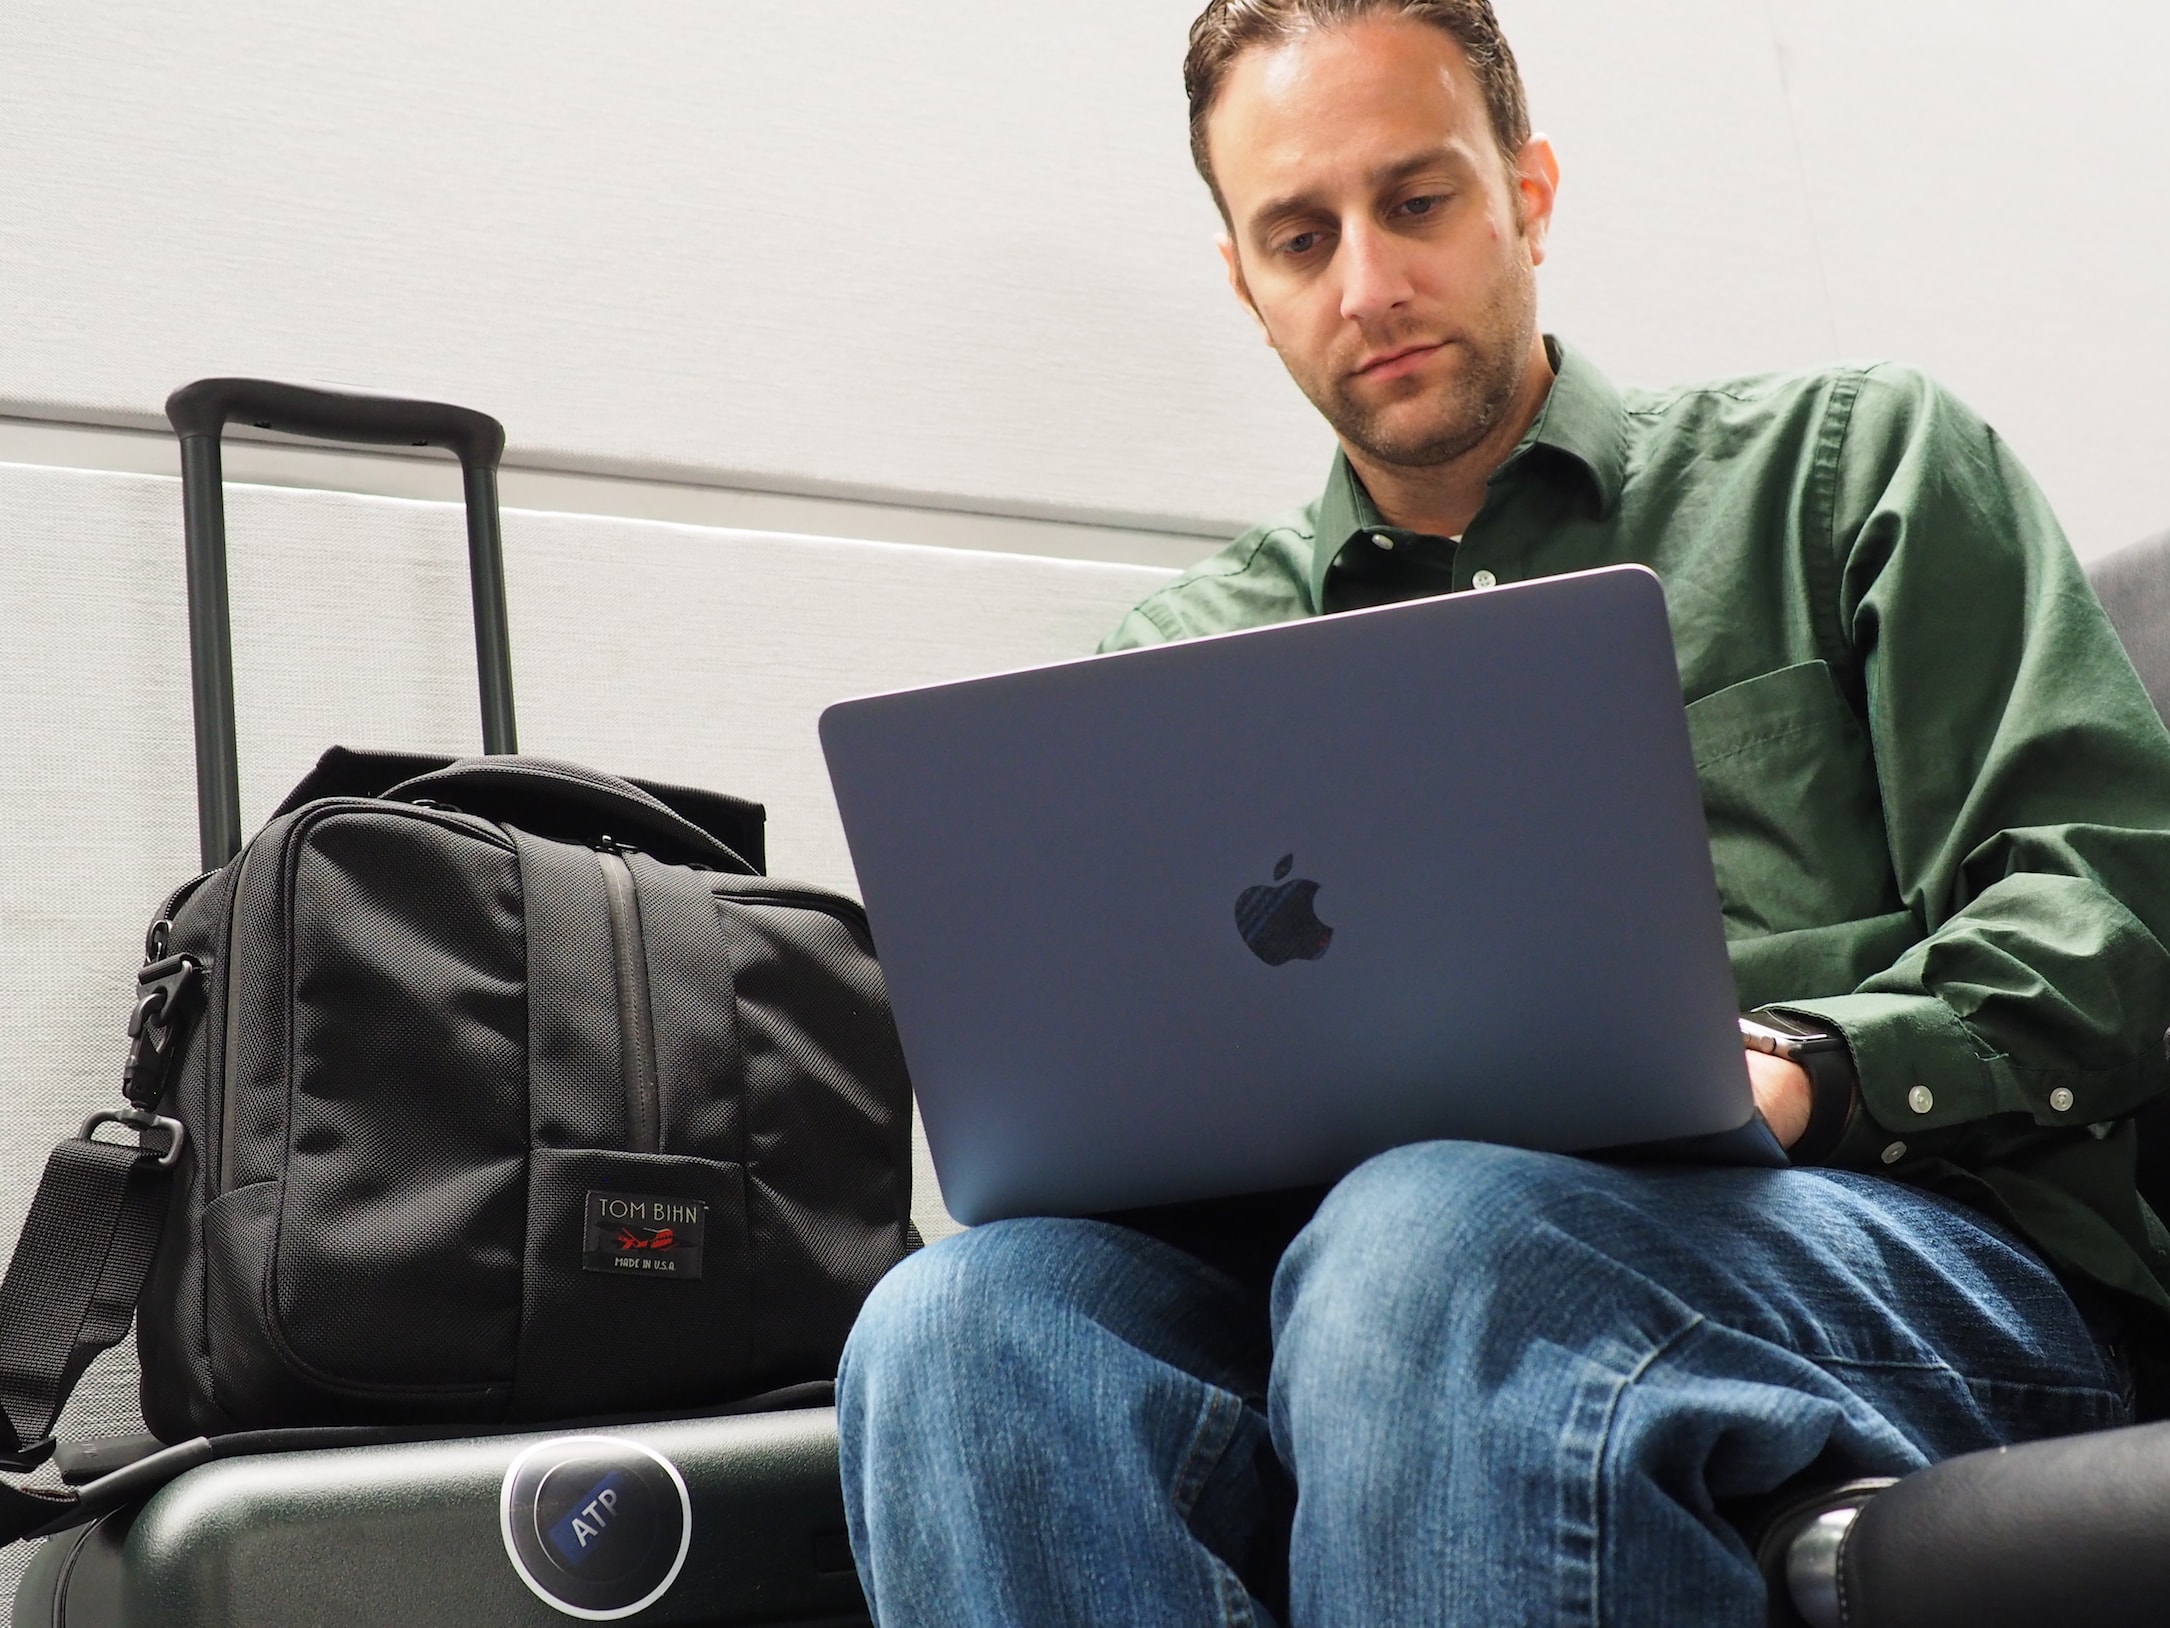
I love my iPad Mini. It is exceptionally portable, easy to use, and efficient at the things it does well. I’ve never owned an iPad Pro—I’ve eschewed the normal size iPad since the first iPad Mini with Retina Display. However, it wouldn’t surprise me if there is an iPad Pro in my future. The combination of iOS 11 and the Smart Keyboard makes it compelling.
I’m not here to discuss tomorrow; I’m here to discuss today. Today, I feel handcuffed every time I use an iPad. Even for the things I can accomplish, I have to jump through flaming hoops in order to do so. It’s not for me.
What I really want (what I really really want) is an iPad-sized device, with all the portability it provides, but with none of the drawbacks of, well, actually being an iPad.
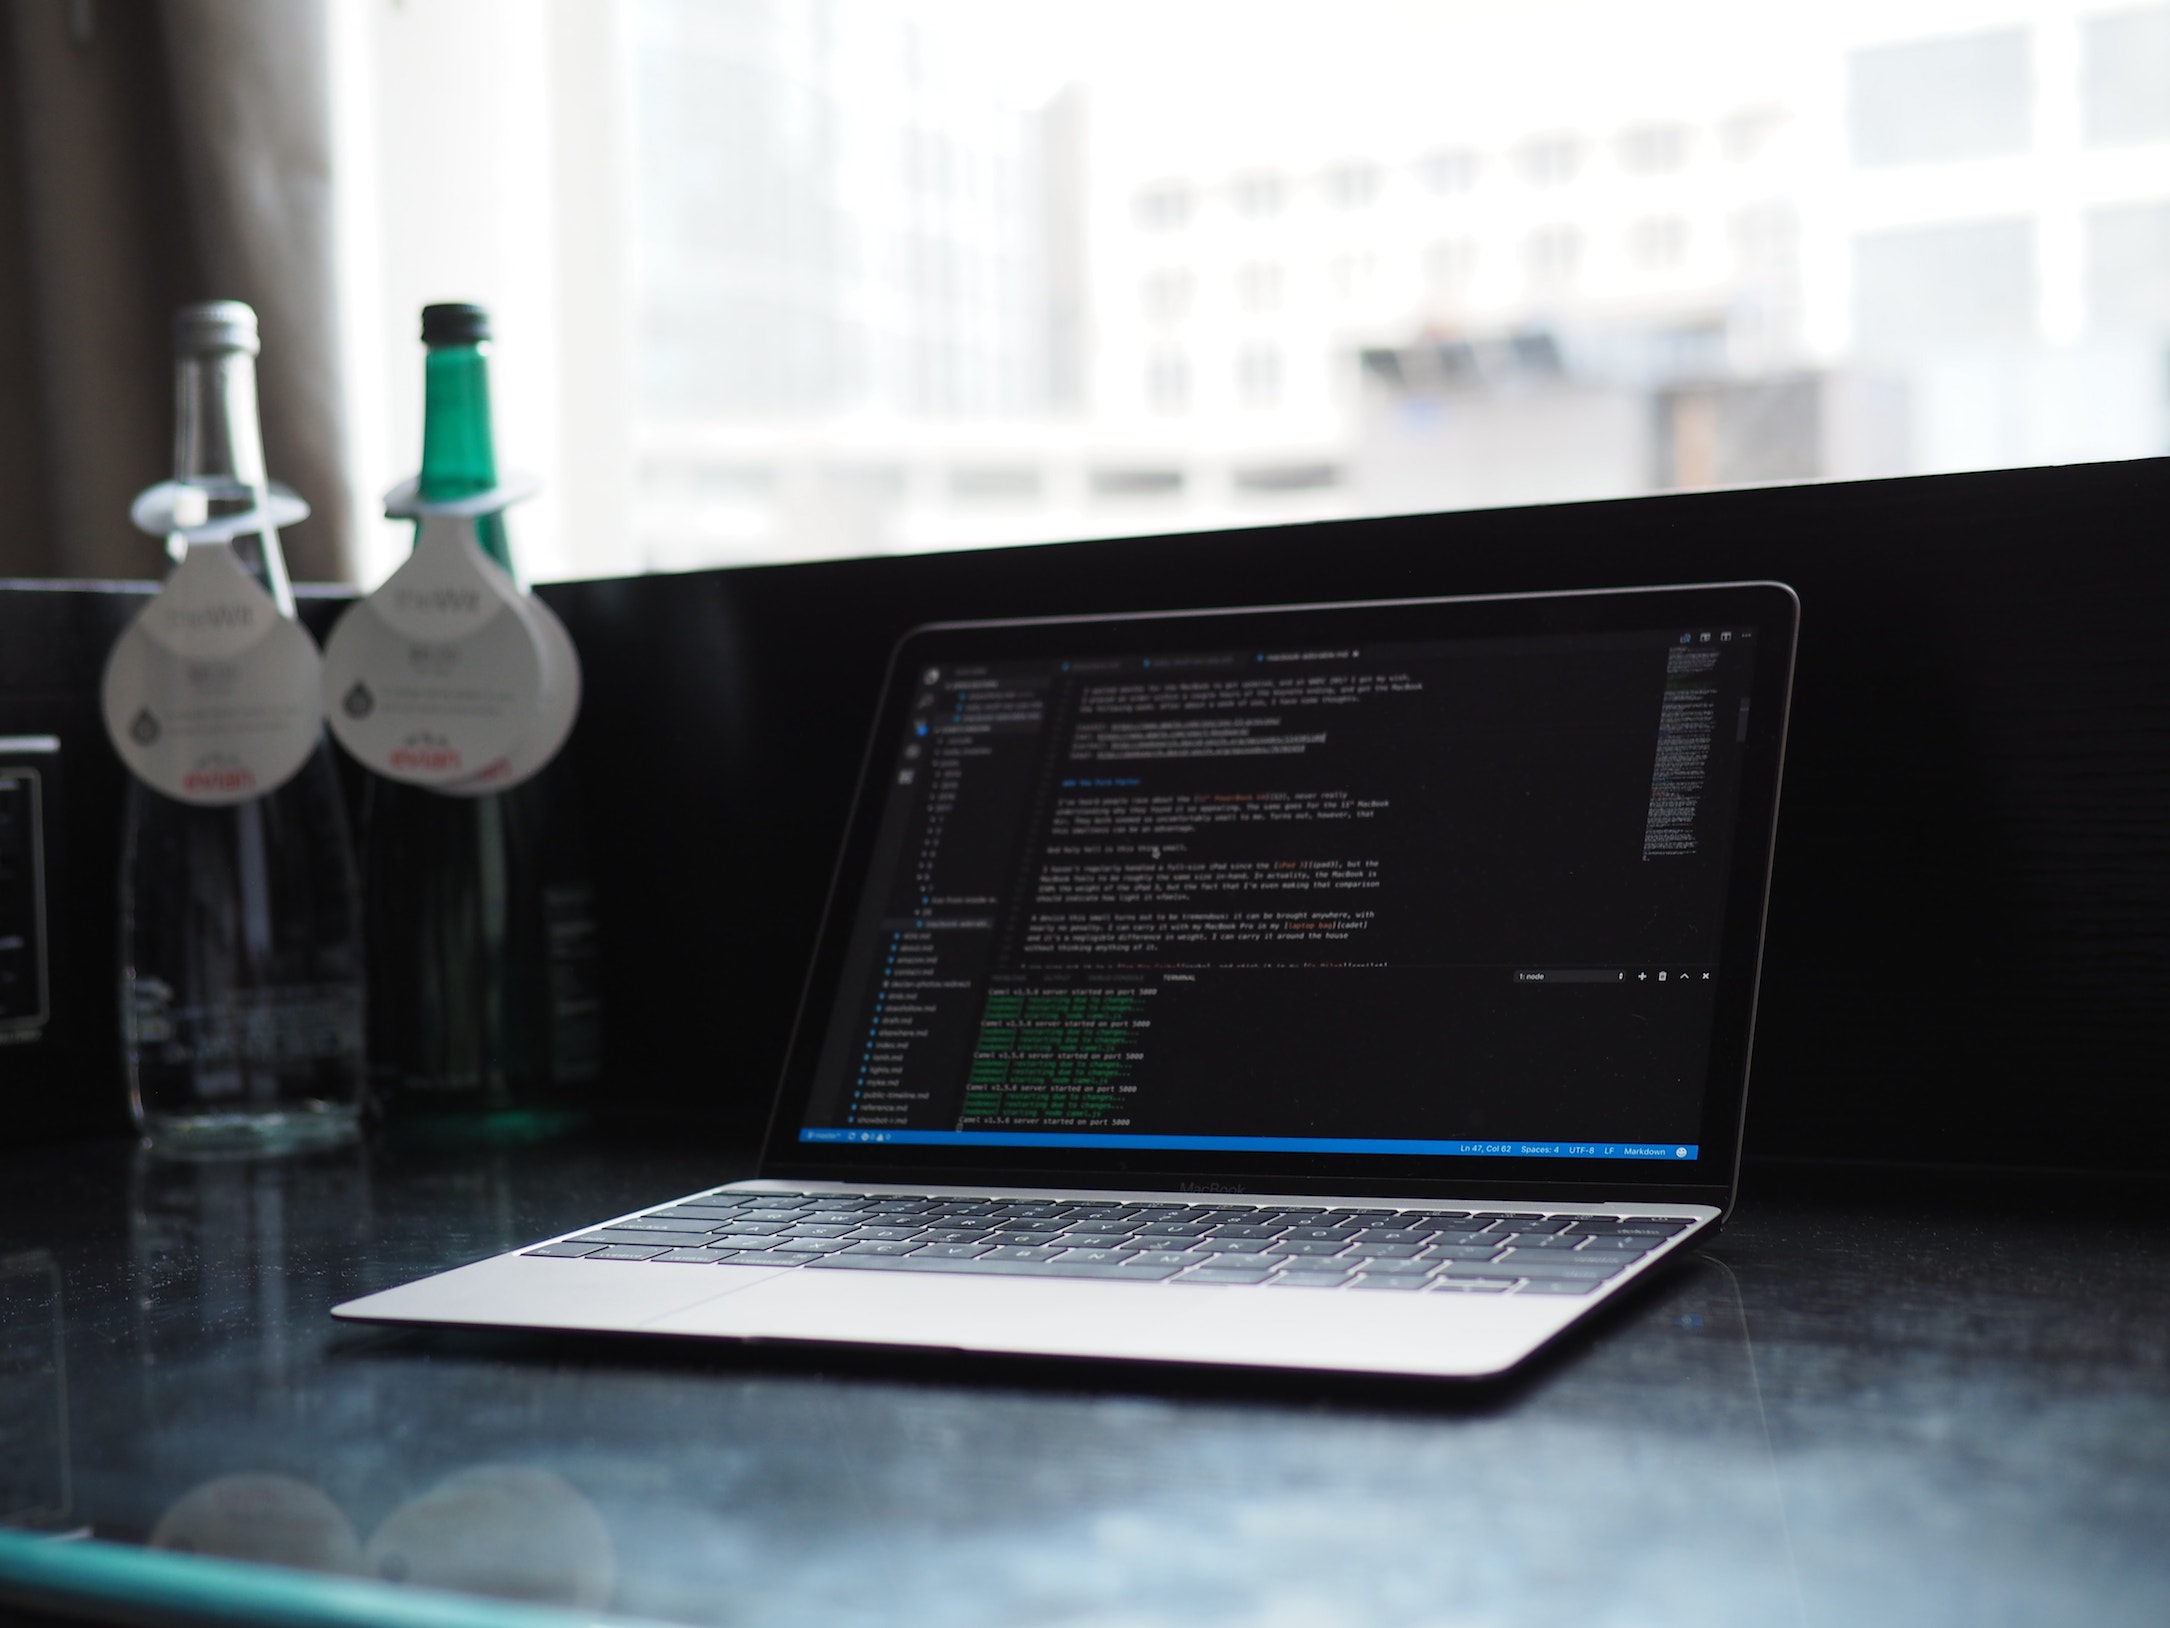
Enter the MacBook, affectionately referred to by some as the “MacBook Adorable” or others as the “MacBook One”.
I waited months for the MacBook to get updated, and at WWDC 2017 I got my wish. I placed an order within a couple hours of the keynote ending, and got the MacBook the following week. After about a week of use—and a trip to Chicago—I have some thoughts.
The Form Factor
I’ve heard people rave about the 12" PowerBook G4, never really understanding why they found it so appealing. The same goes for the 11" MacBook Air. They both seemed so uncomfortably small to me. Turns out, however, that this smallness can be an advantage.
And holy hell is this thing small.
I haven’t regularly handled a full-size iPad since the iPad 3, but the MacBook feels to be roughly the same size in-hand. In actuality, the MacBook is 150% the weight of the iPad 3, but the fact that I’m even making that comparison should indicate how light it feels.
A device this small turns out to be tremendous: it can be brought anywhere, with nearly no penalty. I can carry it with my MacBook Pro in my laptop bag and it’s a negligible difference in weight. I can carry it around the house without thinking anything of it.
I can even put it in a Tom Bihn Cache, and stick it in my Co-Pilot,
which is roughly the size of a standard-issue murse man-bag satchel.
When I bought the Co-Pilot I never expected to put a computer in there; I thought
a full-size iPad was the limit. Traveling with the Co-Pilot as my “laptop bag”
was so freeing; it’s nice to have so little hanging off my shoulder.
The downside to having such a portable Mac? I want an onboard cellular radio. I am fully aware that I can tether from my iPhone. I’m fully aware that I can do so easier than ever before thanks to the tight integration between macOS and iOS. As someone who has owned multiple iPads with cellular radios, I am also aware that nothing will ever beat the convenience of having an onboard connection you can use anywhere.
The Keyboard
I love the modern Apple Magic Keyboard that came with my iMac. To my fingers, it is the perfect keyboard.
There has been much haranguing about the butterfly-switch-based keyboards that Apple is using almost exclusively across their line. Most don’t tend to like them at first exposure. Anecdotally, between half and two-thirds end up somewhere in the spectrum from resigned acceptance to actual enjoyment. The remainder feels passionately about the keyboard, and hoo boy do they hate it.
For me, I started with an active distaste. The keycaps are shallow, the travel is shallow, and for the way I type, the keyboard is really loud. Strikingly so. The noise isn’t unpleasant, but there’s a lot of it. Furthermore, it feels similar enough to my beloved Magic Keyboard to remind me of it, but different enough that I can never forget this isn’t the same.
After a week, I’ve passed through loathing, taken a stop at distaste, spent some time at indifference, and am now moving into actual enjoyment.
The true advantage to the MacBook keyboard is that it feels stable in a way not even the Magic Keyboard does. The keyboard also feels… direct. Generally I’d say “mechanical”, but that has connotations in this context I don’t intend. It’s hard to describe, but where my pre-TouchBar MacBook Pro feels like I’m typing through marshmallows, the MacBook feels the exact opposite.
The best analogy I can give is the difference between a cable-driven shift linkage on a front wheel drive car and the direct feeling of a shift linkage on a rear wheel drive car. Where the former is mushy, and has lots of play, the latter feels direct, strong, and tight.
In fact, the MacBook keyboard is so direct and tight that I’m starting to almost prefer it to my Magic Keyboard. 😱
The real Achilles’ Heel of the MacBook keyboard is the throw—or really, the lack thereof. I feel like if the keys moved an additional ~20% with each press, it would make a world of difference, and bring them much more in line with the Magic Keyboard.
Nevertheless, the thing that annoyed me most about the MacBook has now come to actually please me.
Dongletown, Population: Me
What with the MacBook’s keyboard no longer being the real problem, we can move on to everyone’s unanimous bugbear: the one USB-C port on the device.
Full stop, having a second port—even if it was limited to be power only—would dramatically improve the usability of this device. However, just a couple of dongles can cover not only my day-to-day needs, but also nearly all of my uncommon ones too.
I ended up purchasing four items specifically for this MacBook:
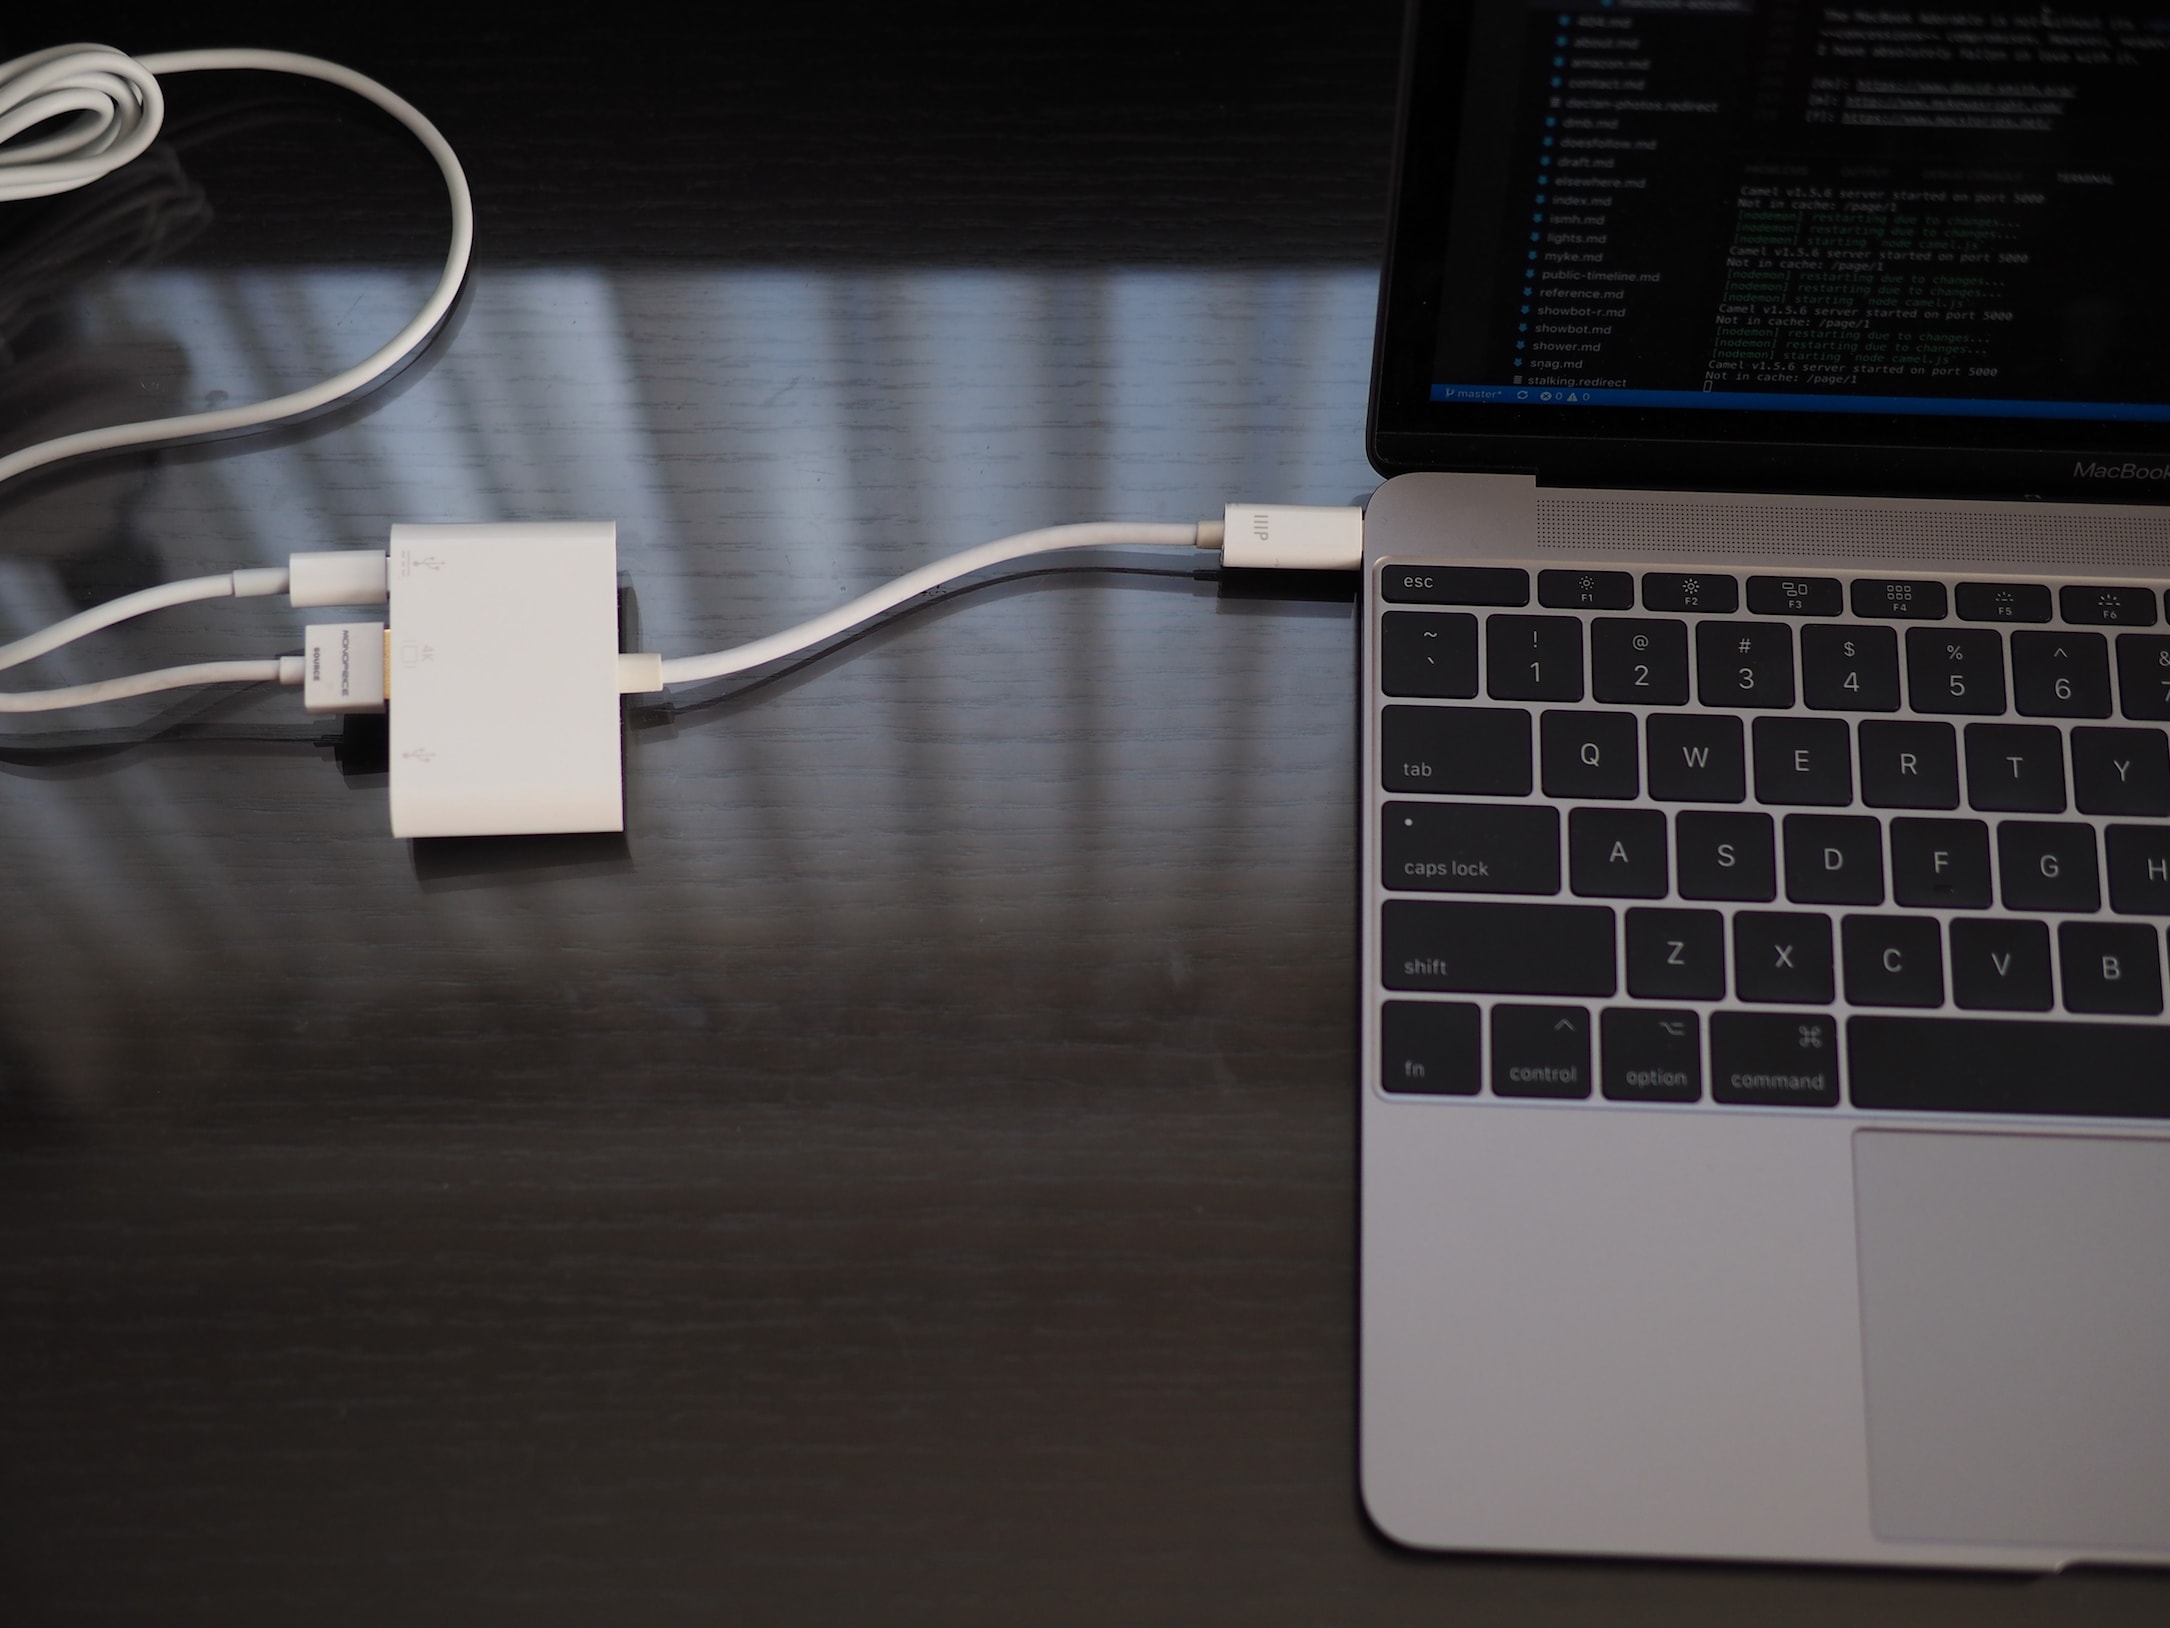
- HDMI — $30
- USB & Ethernet dongle — $30
- SD Card Reader — $12
- USB-C to Lightning cable — $8
In total, I spent $80. By comparison, my MacBook Pro has an onboard SD card reader, an onboard HDMI port, and onboard USB-A ports. Bummer.
Is this really so egregious though? For me, since this is an accessory computer, it will very rarely need to be connected to Ethernet. Or any USB-A devices. Or an SD card. These purchases were mostly to fend off “oh shit!” moments more than they were serving actual, immediate needs. Thus, things probably aren’t as bad as they seem.
To me, the real bummer is the lack of USB-C power passthrough on most USB-C devices available for sale today. As an example, when I attempted to do my initial Time Machine backup, I did so via the Ethernet dongle. However, I had to ensure the machine didn’t sleep, since it was on battery power. Furthermore, I had to stress out about whether or not it would complete the initial backup before the battery gave up, since I had no way to power the MacBook and have it connected via Ethernet.
It’s an odd feeling. A feeling that I don’t expect to have often, as any other time I’m on Ethernet will likely be momentary, such as for transferring a huge file. If I want to leave a single USB-A device connected, or to leave the machine plugged in to HDMI, that dongle does have a power passthrough.
So, the “One” part of “MacBook One” is definitely annoying, but it is by no means a showstopper.
Power
I opted to get a maxed-out MacBook Adorable. It has the don’t-call-it-a-m7 i7 processor, 16 GB of RAM, and a half-terabyte SSD. For such a small computer, it was far from cheap, at around $2000.
During the initial couple of days, I found that I often felt CPU constrained, whether or not that was reality. After those first couple of days, now done with my software installs, moving files, and generally asking a lot of the Adorable, things seemed to settle down nicely. In day-to-day usage, I can’t say that I notice CPU bound activities, and if so, they are resolved sufficiently quickly.
The one place that I do notice some significant slowdowns is when I occasionally
transcode video files using ffmpeg. In the defense of the MacBook,
this is a hilariously inappropriate use of this [fanless!] hardware. That’s
why I have an iMac upstairs. But in a pinch, if I do need to do a transcode, I
now know to expect it’ll run half as fast as it does on the iMac.
It’s also really nice to be able to get a 512 GB SSD. I have the leeway to put just about whatever I want on the machine, all without the stress of micromanaging what’s on the MacBook. I’ve made the mistake of getting only enough disk space to cover what I need today—in Erin’s MacBook Air—and I regret it. Her 128 GB MacBook Air is bursting at the seams, and has been for far longer than I ever expected.
Screen
I don’t have good enough eyes nor perceptive enough vision to be able to comment on the colors or any of the other things designers care about. What I care about is real estate, especially on a device this small. There are four available effective resolutions that macOS will allow:
- 1440 x 900
- 1280 x 800
- 1152 x 720
- 1024 x 640
As someone who suffers from a peculiar eye condition, it is very hard for me to see when I don’t have my hard contacts in. It’s really nice to be able to set the MacBook to its smallest resolution and make everything really huge. With my contacts in, at the maximum resolution, I definitely feel a bit constrained but I wouldn’t go so far as to say limited. That is to say, it doesn’t prevent me from getting things done, but it doesn’t feel spacious either.
Conclusion
I was discussing the MacBook with my friend _David Smith. He’s had a MacBook for a while and was debating upgrading to the latest version. Dave said to me something that I think is spot on:
The MacBook is the “old person’s iPad”. The affection I have for it reminds me of what folks like Myke and Federico say about their iPad, but I’m too set in my ways to make the switch.
Thanks to the MacBook, I don’t have to.
I completely agree.
The MacBook Adorable is not without its faults
concessions compromises. However, especially as a secondary machine,
I have absolutely fallen in love with it.
I can now say I’ve recorded a podcast, on professional equipment, inside WWDC. _David Smith invited me to record an impromptu show with him; we just released the episode as a B-Side on Relay.
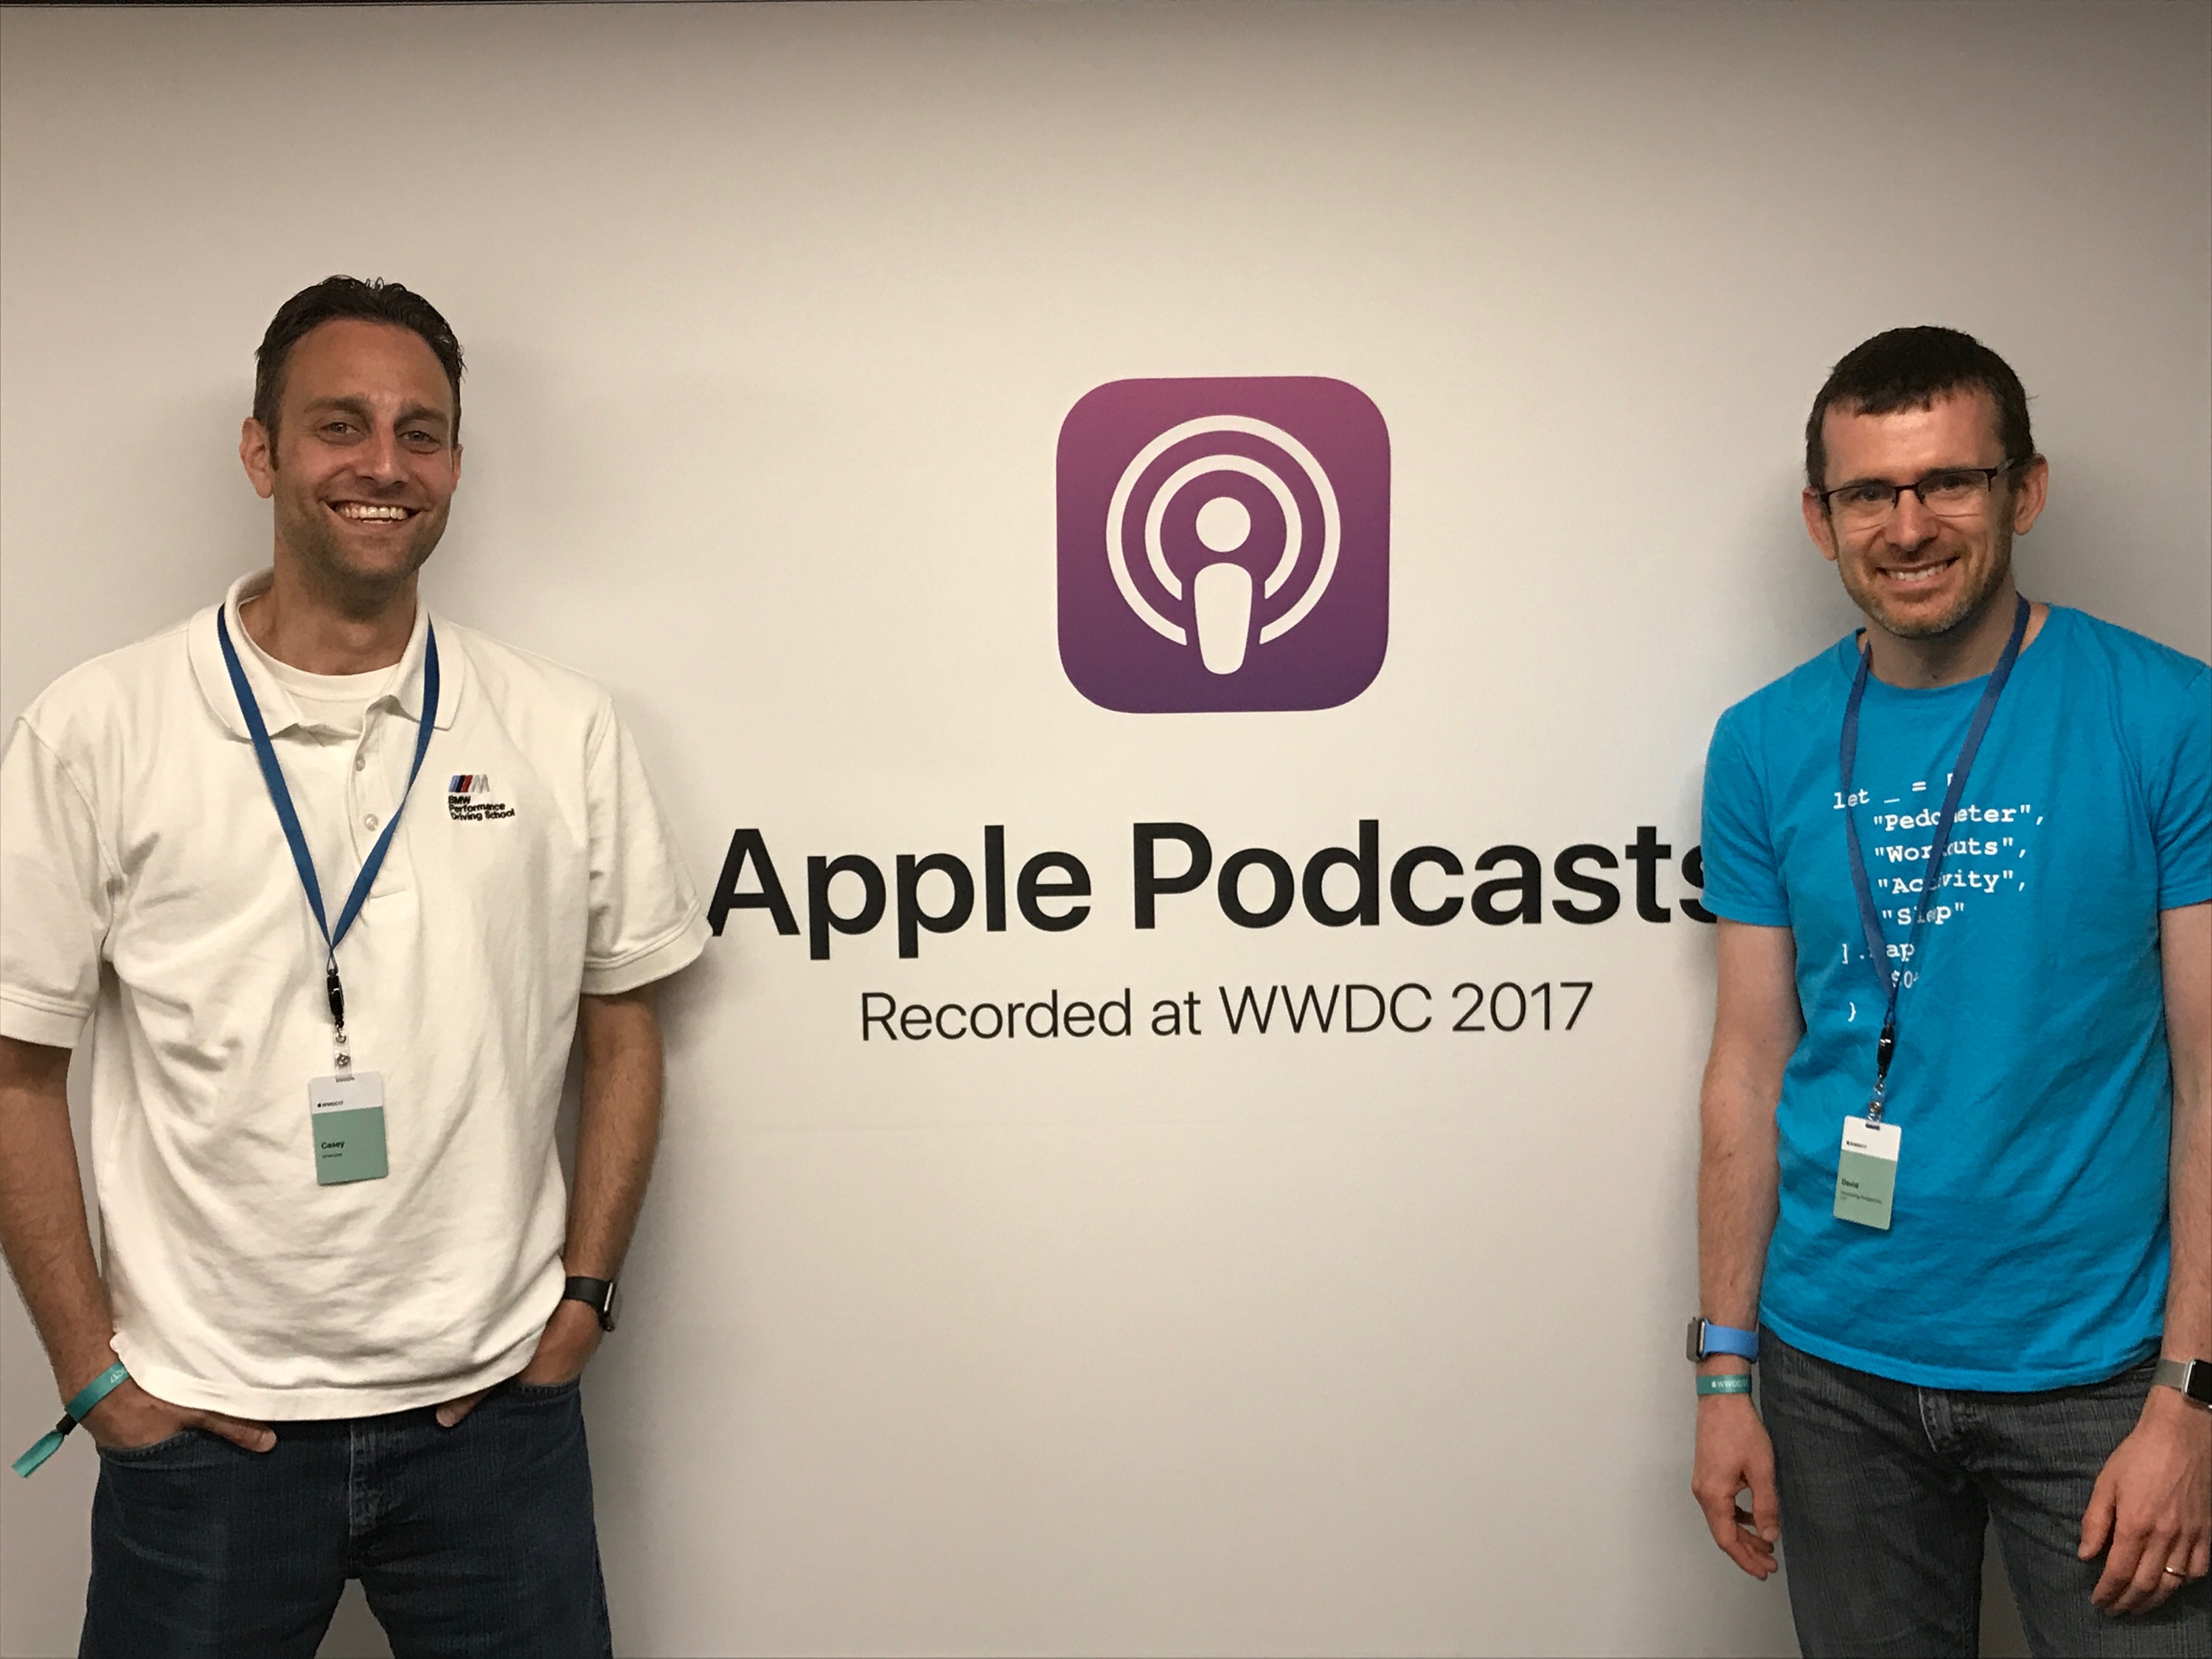
This year—in a surprise move—Apple offered a full podcast studio to attendees. You book online, first-come first-served, and you get a 45 minute window.
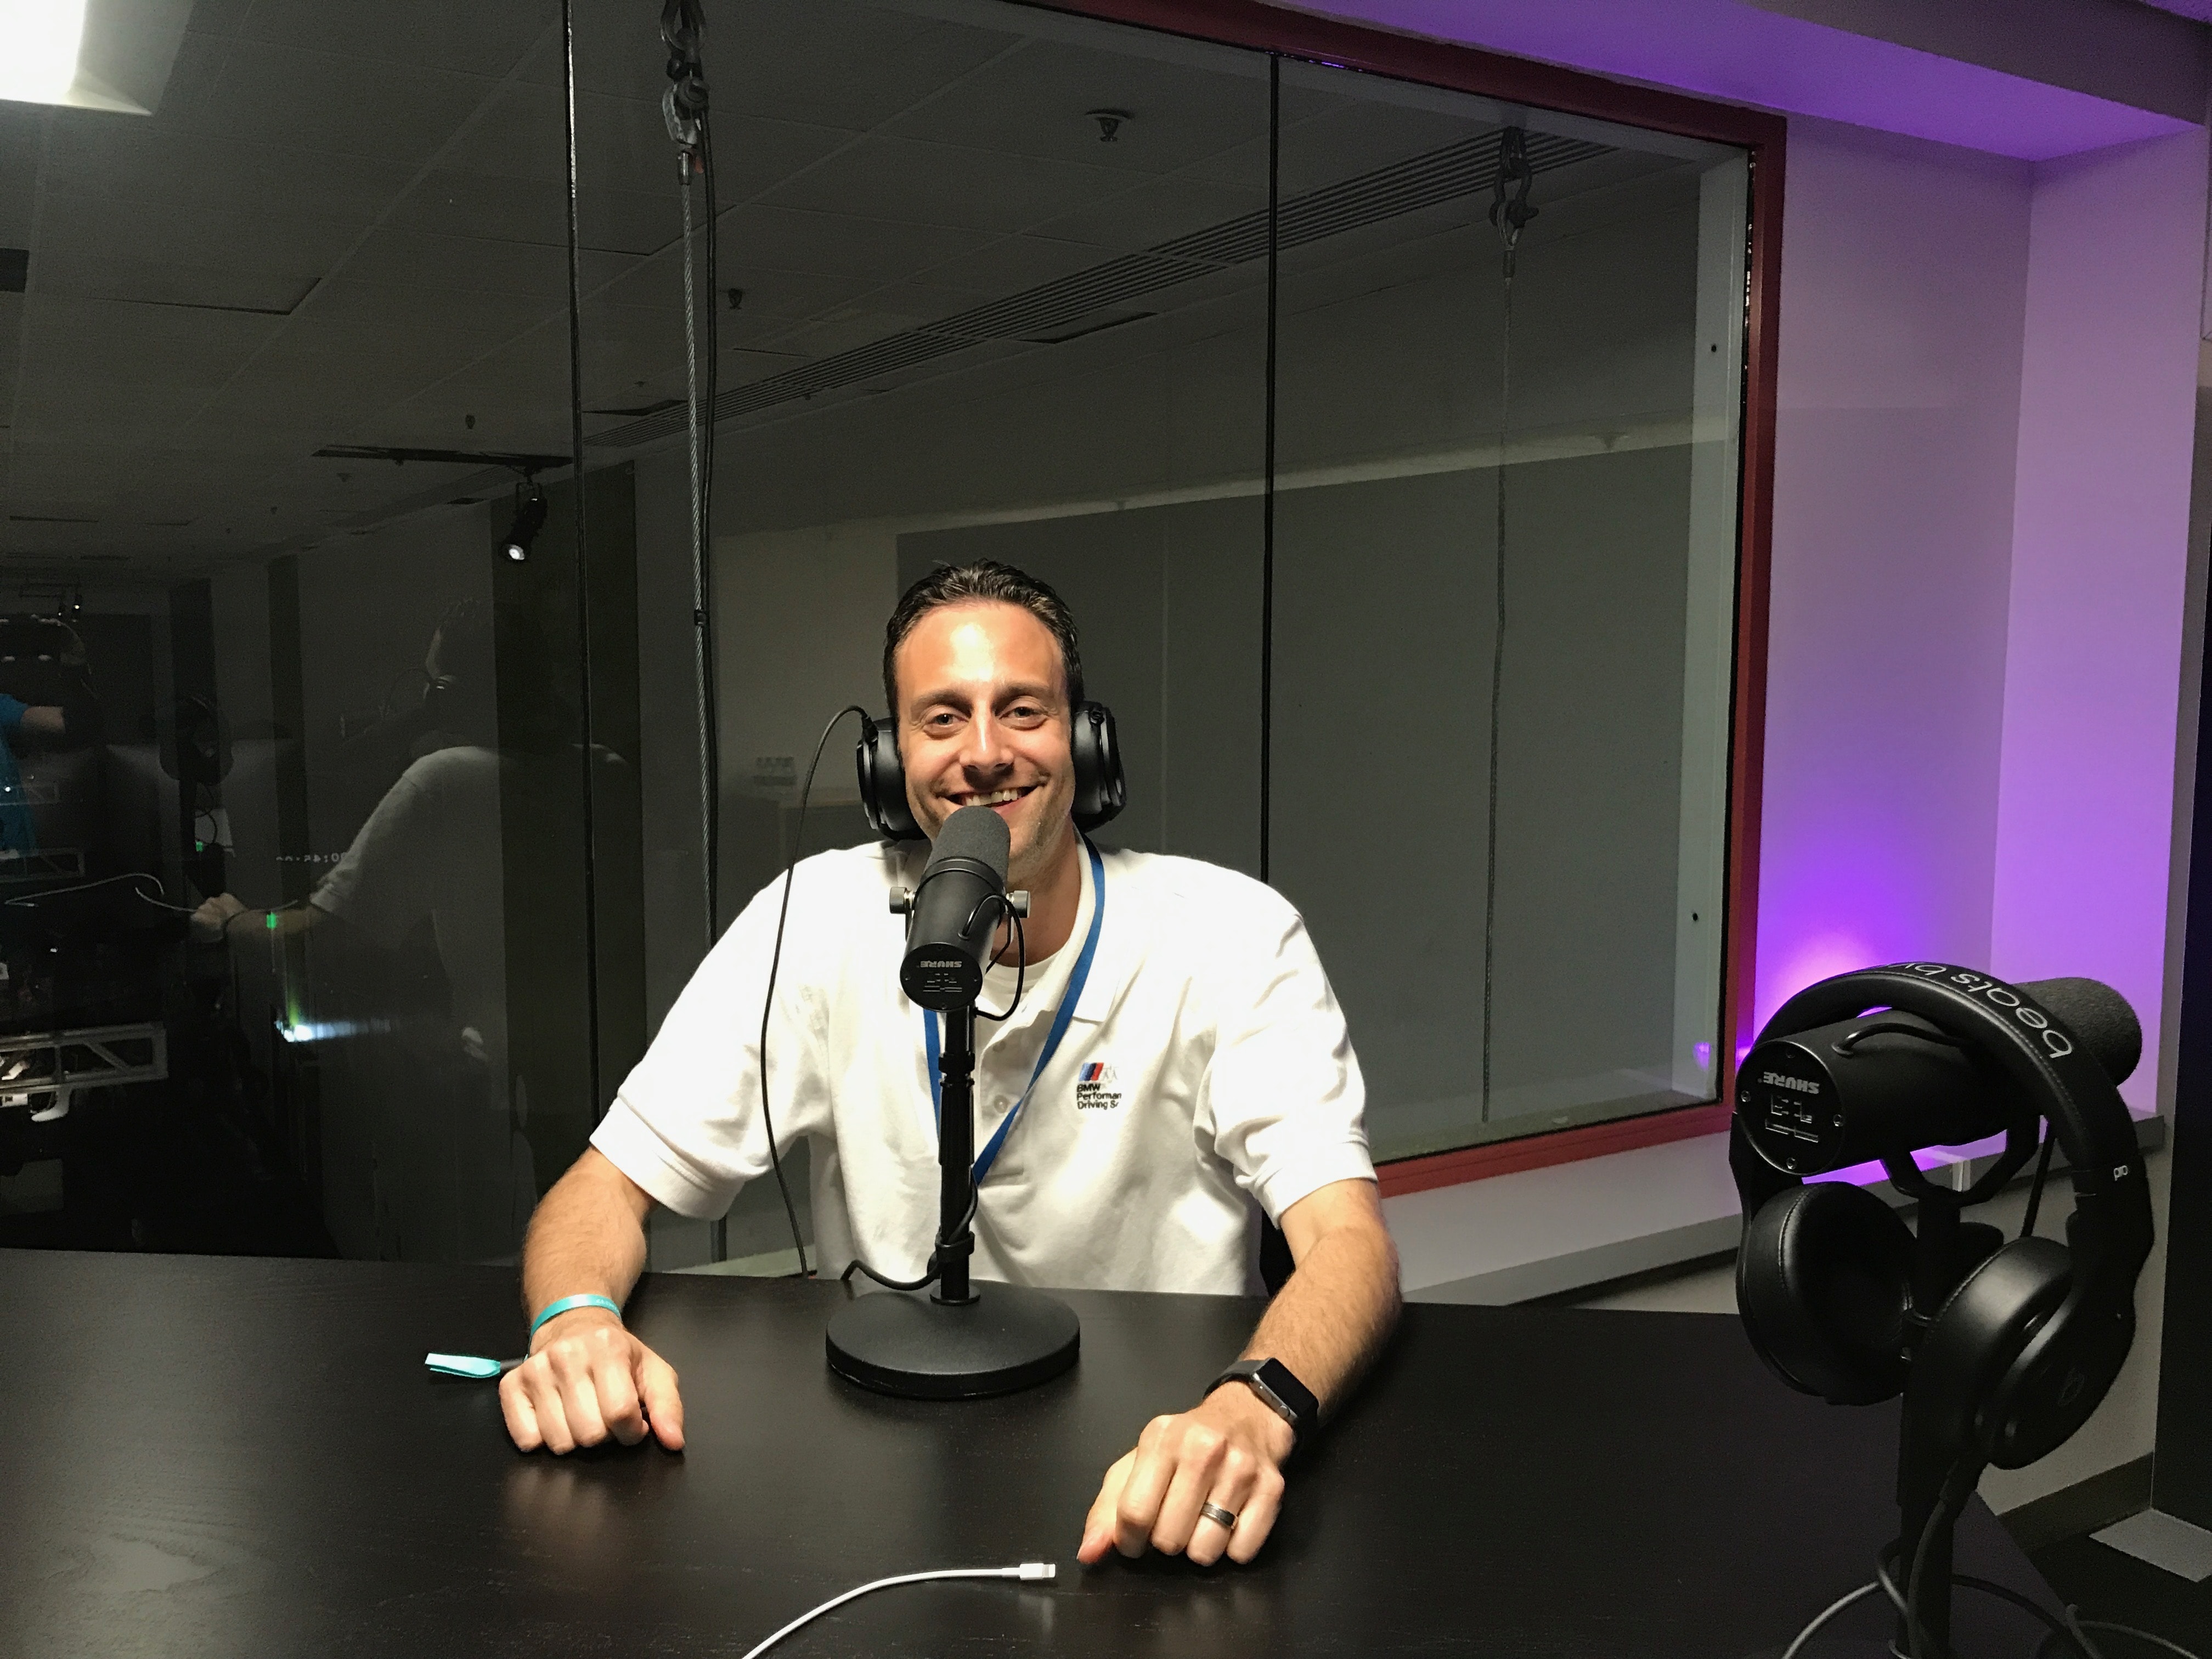
The studio is staffed by one audio expert to manage the recording (via Logic). There are four Shure SM7B microphones, all with wired Beats headphones.
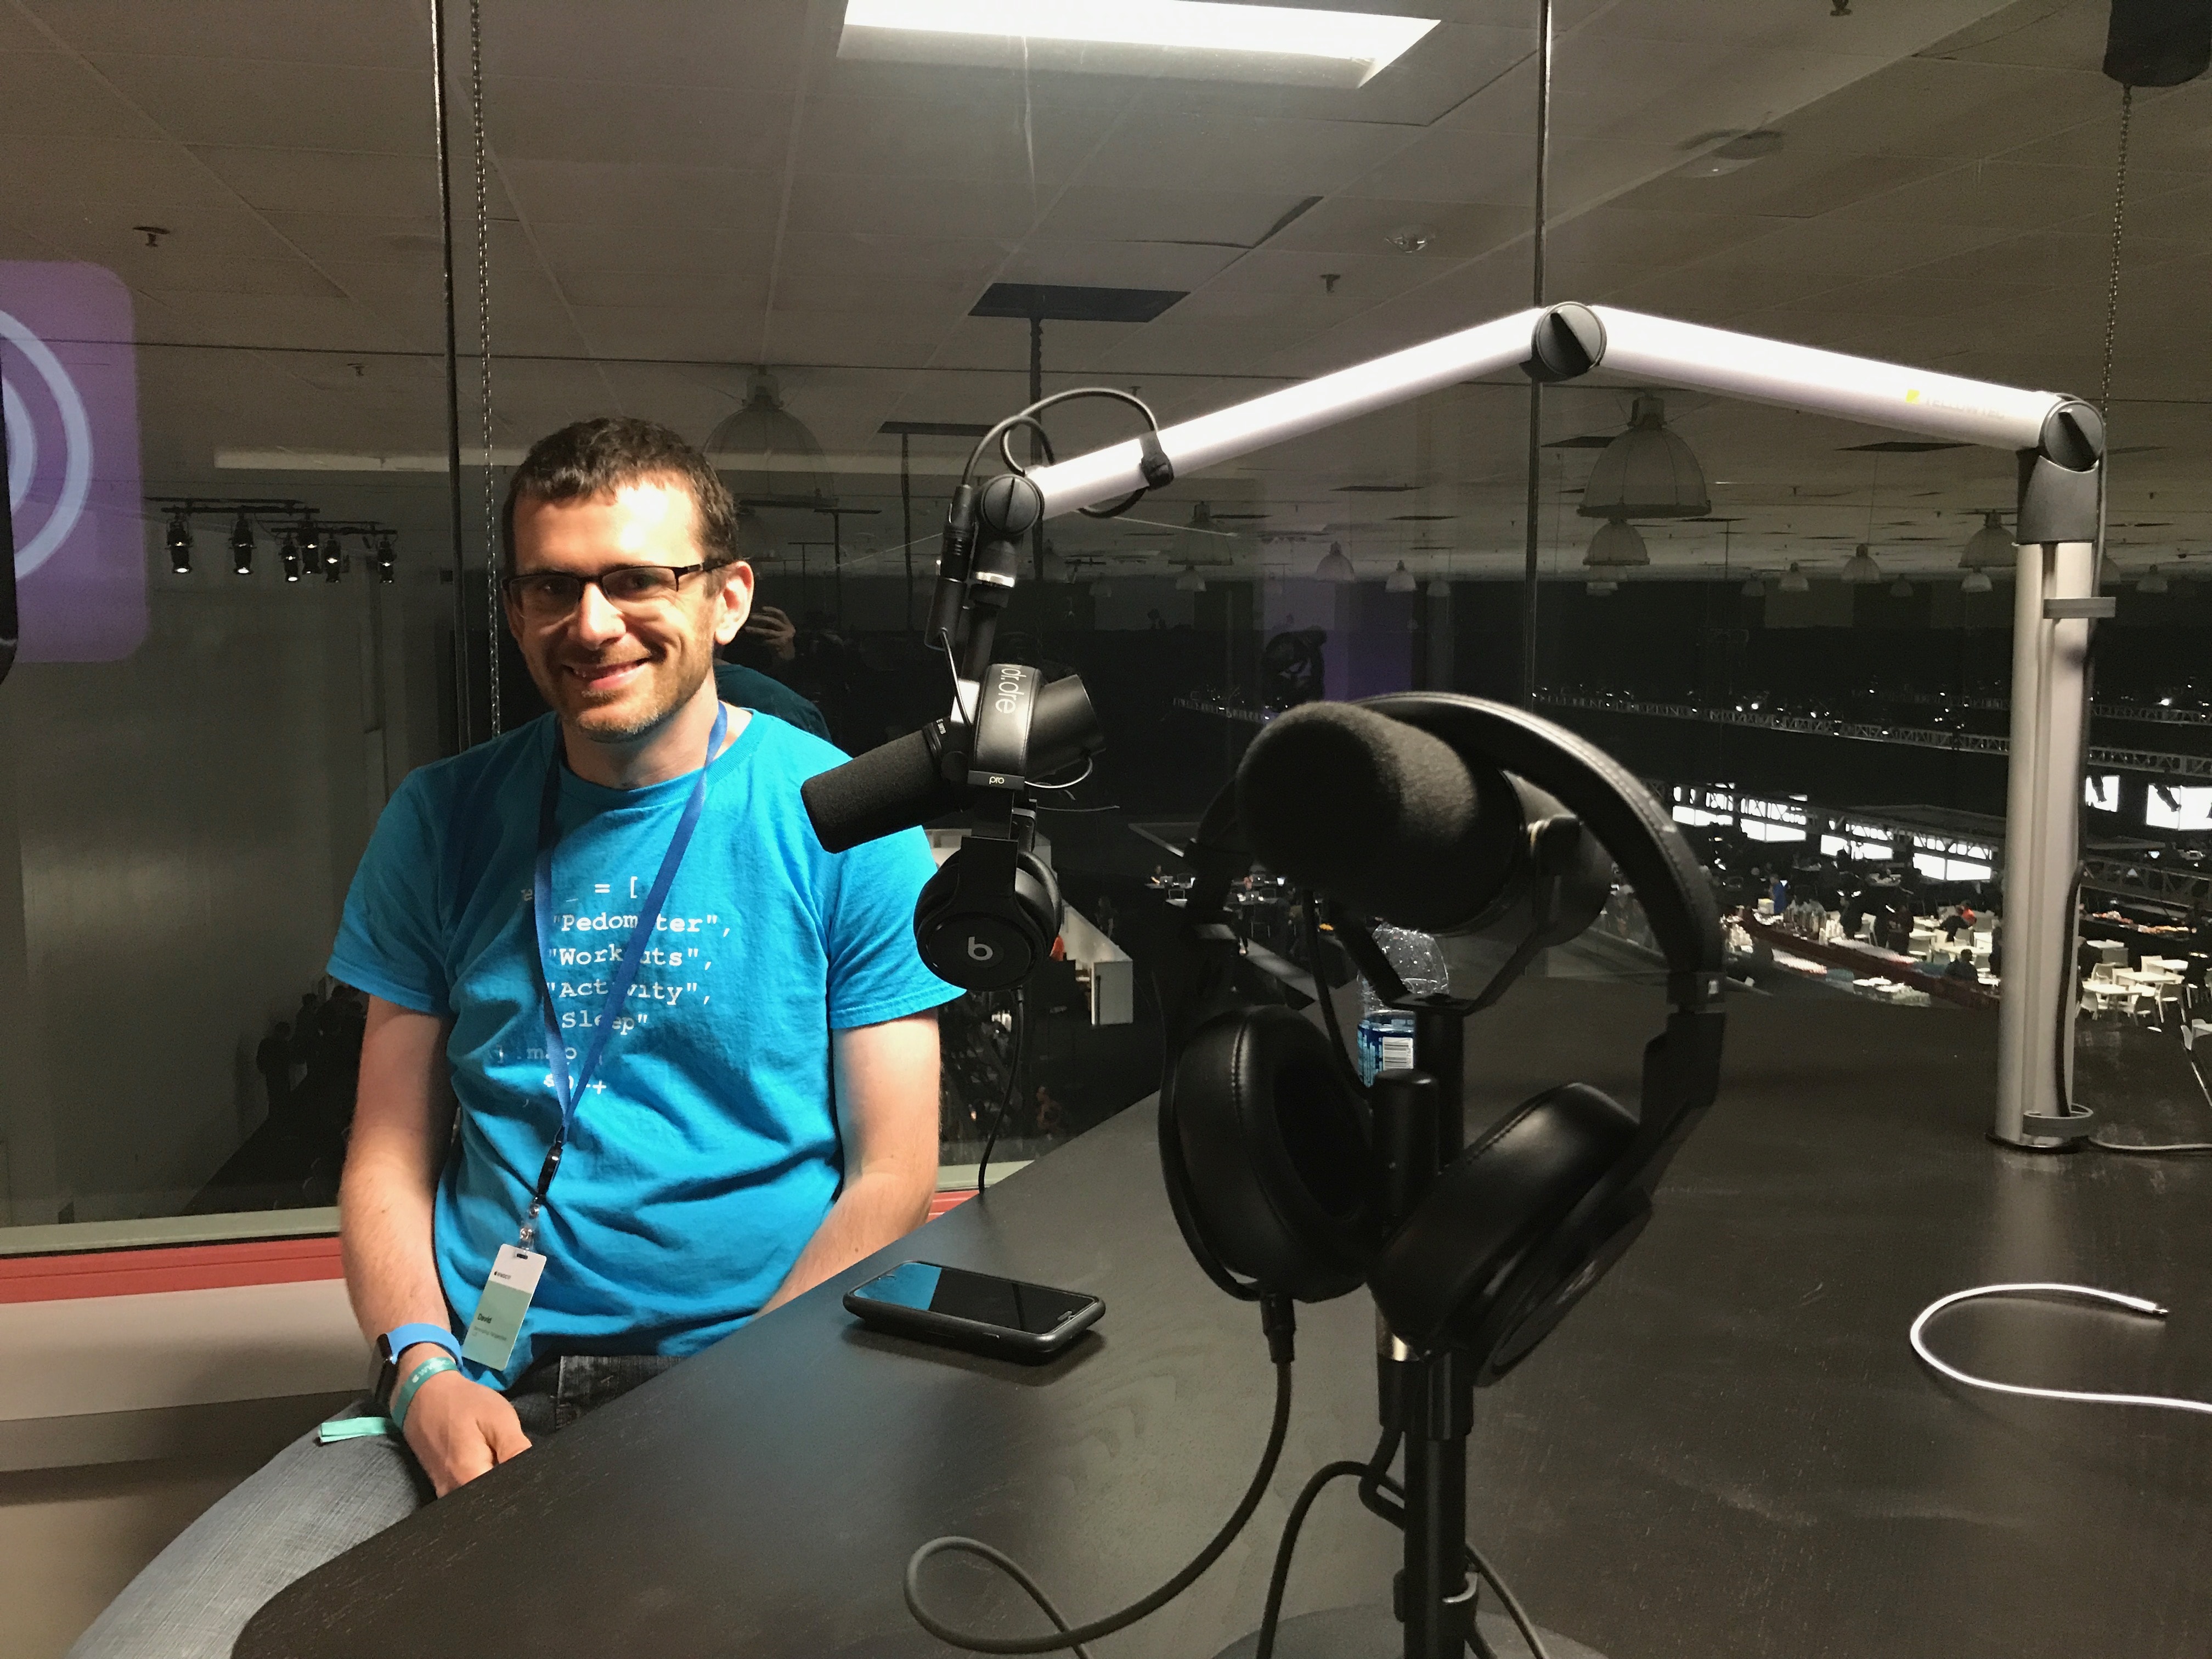
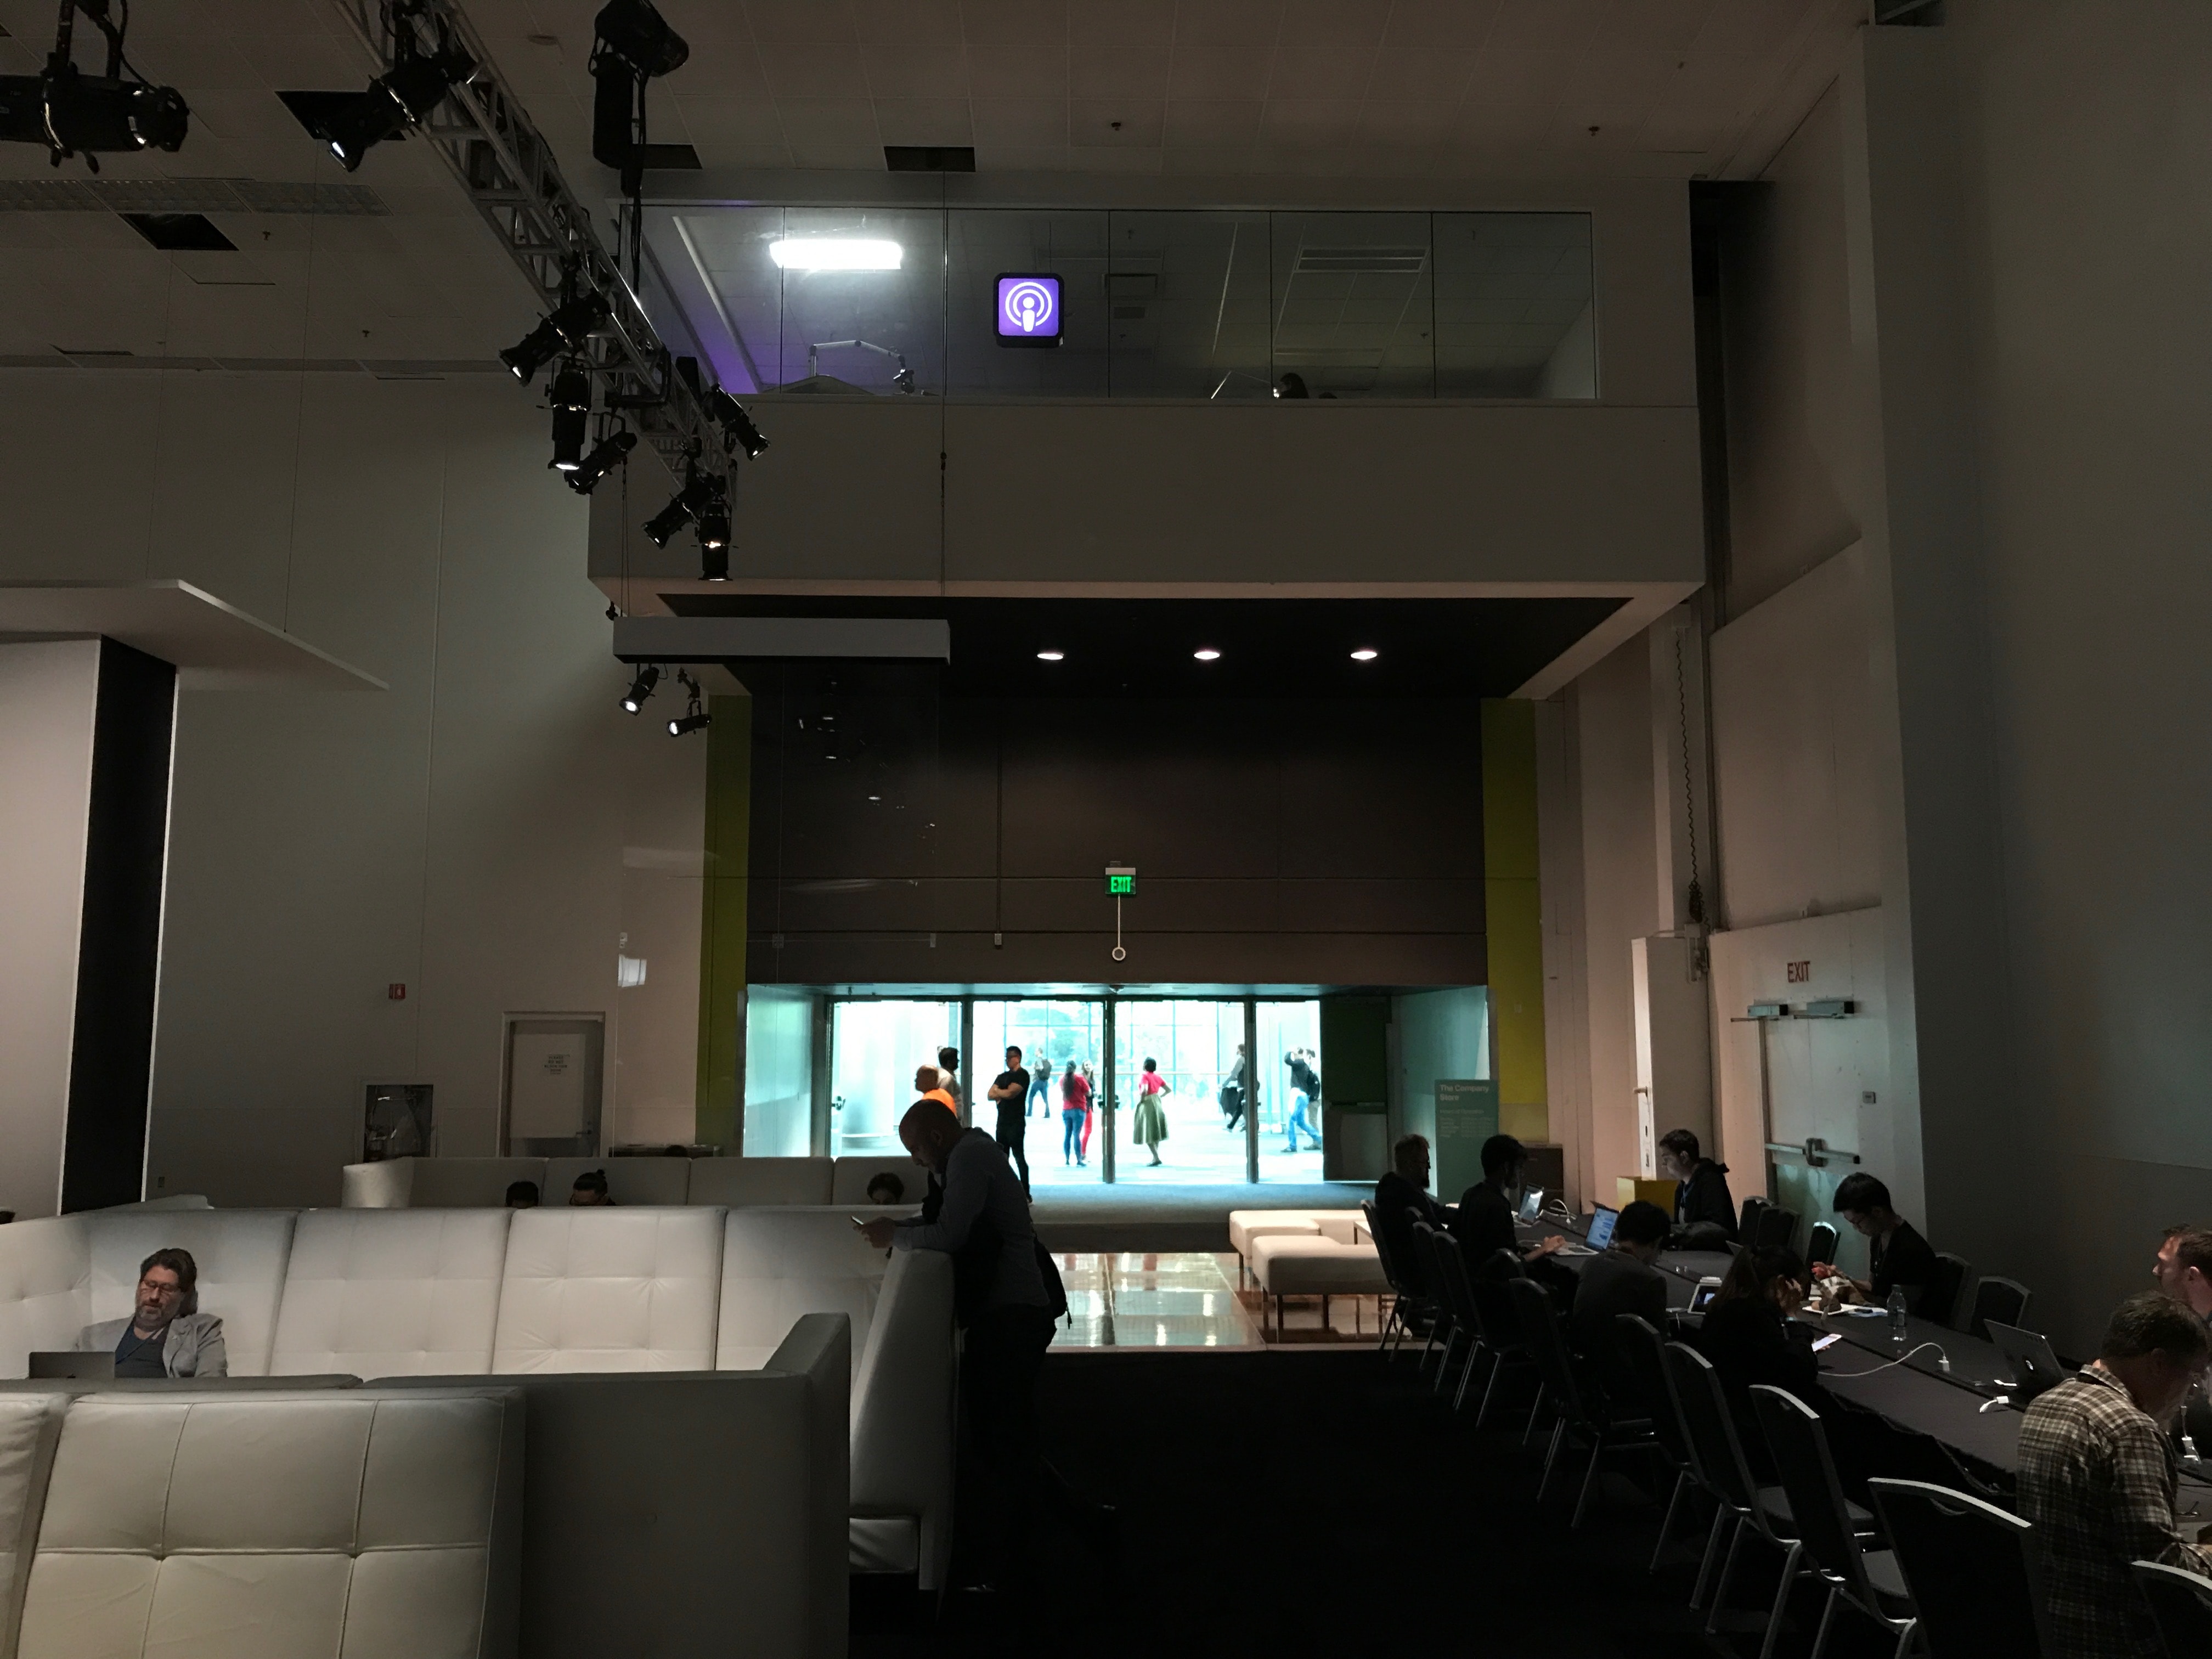
To get to the podcast studio was rather funny. You went to the UI lab room and were escorted in the employee-only sections of the convention center. We ended up in a glass-encased booth that was floating above the main gathering area (and company store). You can see the booth from just in front of the company store. There is—of course—an illuminated podcast logo marking it.
The room was really nice and pretty. Recording audio in a glass-walled room is certainly an odd choice, but from what I can tell the recording wasn’t affected by it. Once you’re done, they give you a USB stick with a couple of WAV files on it for you to post-process as you see fit.
The folks in the studio were super nice and very helpful. We asked what was under an implied NDA and were told we could discuss the setup and pretty much anything we saw in the studio.
I’m ecstatic that Apple provided a space for podcasters to record. In principle, this would allow many of us to leave our equipment at home and not tote it all the way to California. However, there were some problems:
-
Booking is done online the day of, which means for podcasts you must record, you can’t bank on having the space. So for regular shows like ATP, we couldn’t rely on this space.
-
The slots were only booked for an hour, which makes sense: there’s only so many hours in the day, and only one studio. Apple is trying to be fair. However, for shows like ATP, we couldn’t squeeze a whole episode in 45 minutes.
Nevertheless, it was a really great and welcome gesture from Apple toward podcasters, and I really appreciate it. It was super fun and I’m really glad Dave invited me to join him.
Now, Apple, about getting podcasters press credentials…
As of a few months ago, I’m living an all-Retina life. I replaced my crummy Lenovo monitors I was using at work with a 4K screen. That gave me enough resolution to run pixel-doubled, which means my monitor at work is Retina.
Having a Retina-capable external monitor is magnificent. As an iOS developer, being able to run iOS Simulator on my external monitor, at full resolution, is completely freeing. For MacBook and MacBook Pro users, I can’t recommend an external Retina-caliber monitor enough.
Recommendations
As I write this, there are three general options, that will work with most modern Macs:
-
Budget: LG 24UD58-B 24" 4K Monitor — ~$300
This is what I use at work. The stand is completely static; you cannot adjust it in any way other than tilt. The case is a shiny black, and there is a single LG logo on the front. The actual LCD is great. -
Intermediate: Dell P2415Q 24" 4K Monitor — ~$370
The Dell is a slightly upmarket choice. It has better color reproduction and the stand is far more adjustable. The base is visually much louder, but otherwise it’s fairly nondescript. -
I Hate Money: Dell UP2715K 27" 5K Monitor — ~$1500
If you want something larger than 24", you’ll need to jump to 5K. Which, in turn, means you’re basically buying a 5K iMac but throwing away the computer part. This is super spendy, but it’s surely a hell of a monitor.
Once you buy one of the above, you must plug in via DisplayPort. If you use HDMI, you’ll run at 30 fps, which is awful. You can get a cable for Thunderbolt → DisplayPort from Amazon, or a USB-C → DisplayPort from Amazon.
Additionally, there are two options for those with a fancypants MacBook with USB-C:
-
I Dislike Money: LG UltraFine 4K Display — ~$700
This is the semi-official 4K offering from Apple. It connects via USB-C and also functions as a bit of a docking station. I’ve heard very mixed reviews of the LG monitors, but in principle, they sounds great. However, if your budget can allow for it, I don’t know why you’d get the 4K and not the 5K. -
I Really Dislike Money: LG UltraFine 5K Display — ~$1300
This is the semi-official 5K offering from Apple. All the benefits and drawbacks of the 4K display is applicable here as well.
You can see a bit more about all of your options—for any generation of MacBook or MacBook Pro—on the official Apple Support article.
Justification
So how did I land on these three? A combination of a little trial-and-error, in concert with some information from someone I respect.
The trial-and-error happened at work. We had a couple of screens that were larger than 24" and only 4K. It was quickly obvious that the ostensible point of Retina—not being able to see pixels—did not work at those sizes. Once you cross over 24", you absolutely must go to 5K.
In summary, if you want external Retina, follow these rules:
- No more than 24" at 4K
- For anything more than 24", go 5K
- Use DisplayPort or USB-C
Peer Review
On a similar vision quest, Marc Edwards starting doing math, computing
the pixel density of several popular displays. He eventually landed on
this super-useful image which I’ve stolen appropriated from
Marc’s awesome post:
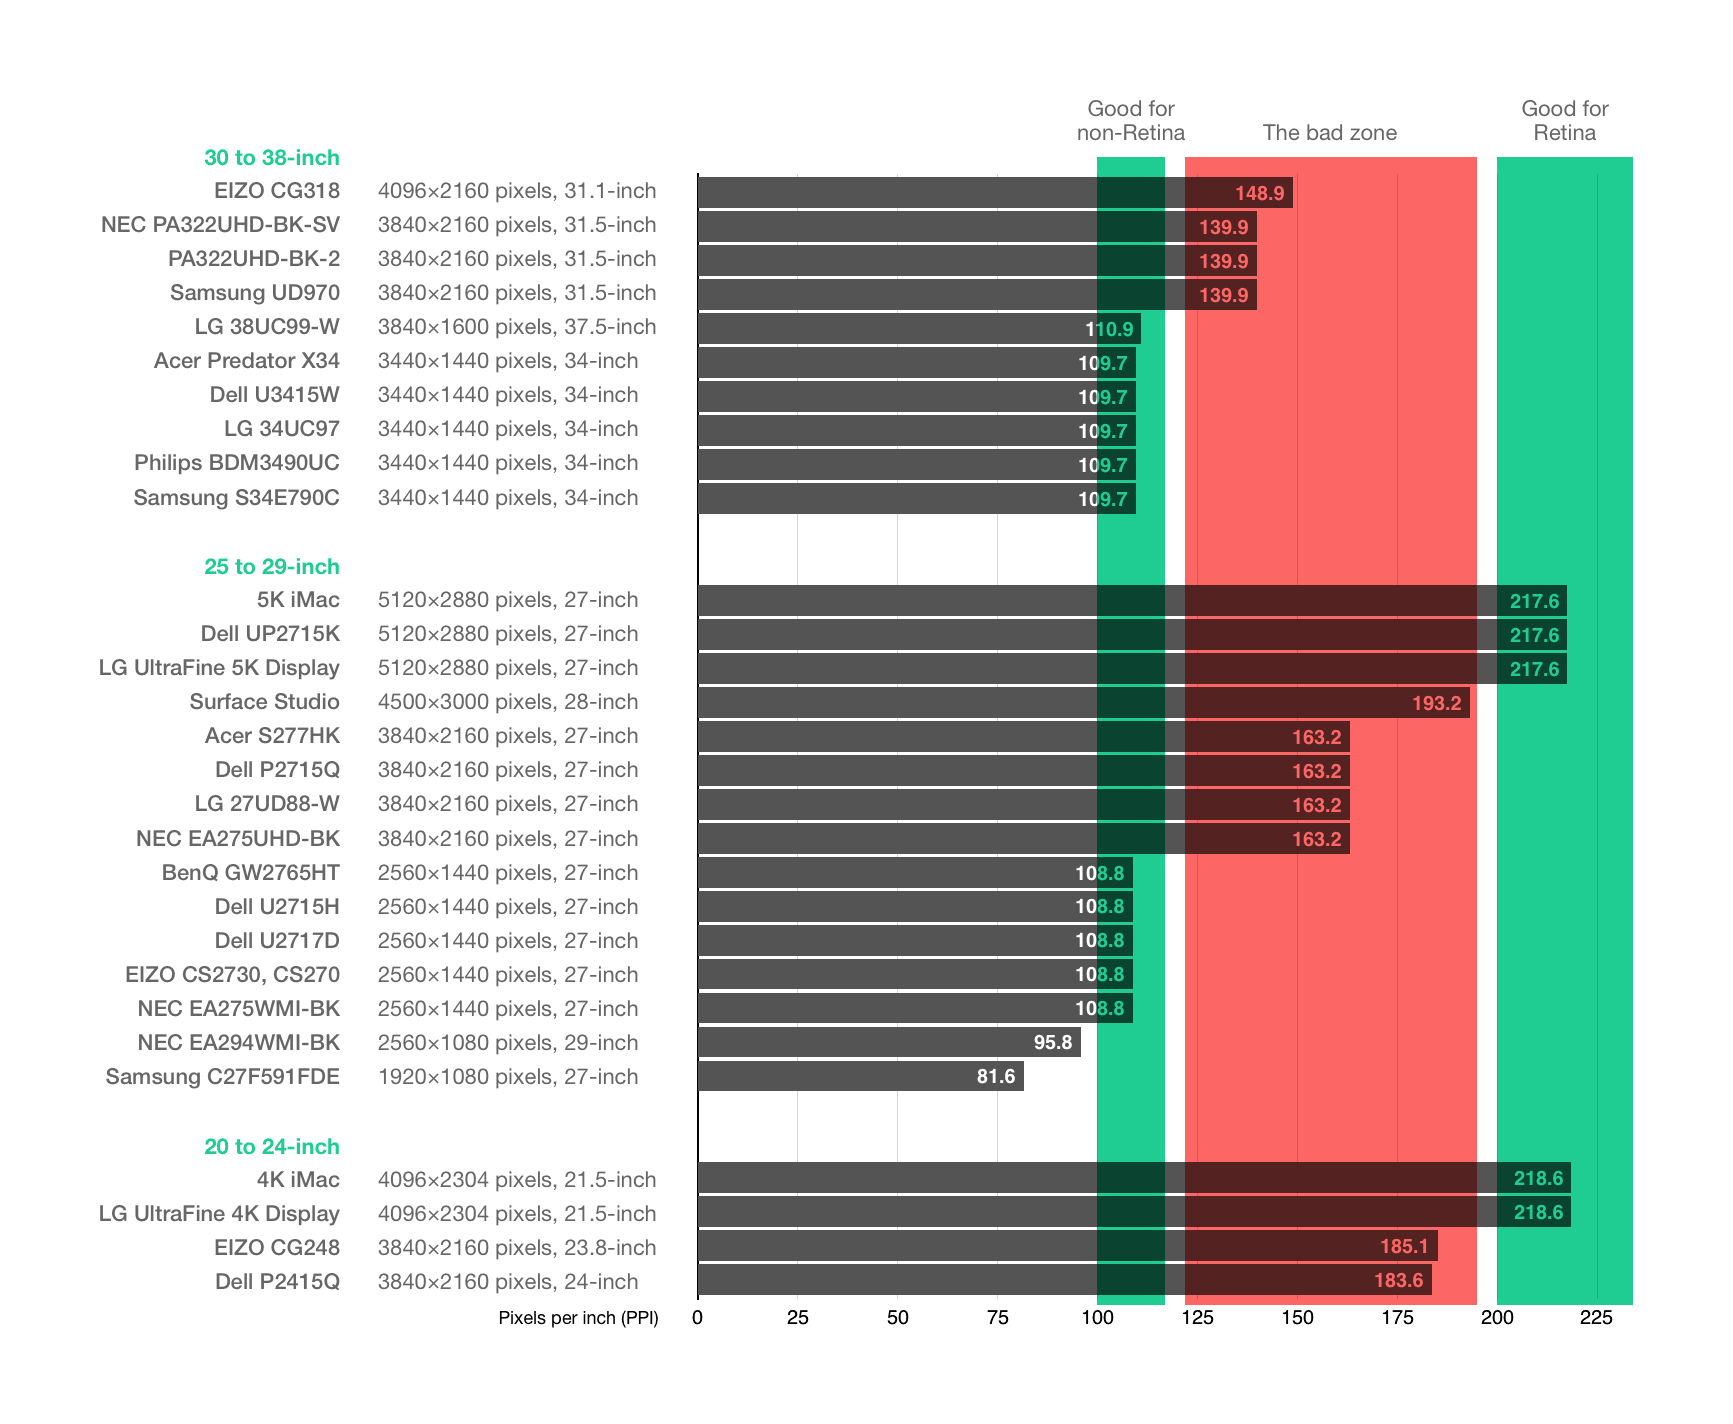
If you look at Marc’s chart, you can see what the issue is. Displays over 24" that are only 4K land in “the bad zone”—more resolution than non-Retina, yet not enough to be full Retina.
Go Spend Money
If you’re using an external monitor hooked to an Apple laptop, I can’t encourage you enough to get yourself a Retina-capable one. You can spend as little as $300 or as much as $1500; choose the price that best fits your budget. Once you stop seeing individual pixels, you start to see how beautiful macOS really is.
In the United States, this week is National Infertility Awareness Week. Infertility is an important issue to me, as my family has struggled with it. According to national statistics, one out of every eight couples struggles with infertility. Anecdotally, most never speak about it.
It took Erin and me four years to conceive Declan, and we were only able to do so thanks to the help of science and medicine. Declan simply would not be here otherwise.
During this awareness week, a few things have come to my attention that are worth linking.
A friend of a friend has launched Fruitful, a fertility mentorship program. Infertility is nigh impossible to truly understand without having lived through it. Even those that have struggled with infertility may have had wildly different experiences: natural conception after simply tracking the woman’s cycle, conception only via intrauterine insemination, conception only with in-vitro fertilization, or perhaps conception only with the aid of donor sperm, a donor egg, or a surrogate.
Fruitful is—using their own words—“committed to making infertility suck less”. I would have adored having a group like this available to me when we were struggling. Though new, I have high hopes for Fruitful; it’s a real boon for those struggling.
A few personal stories have also been shared with me this week. All of them are truly and uniquely beautiful, and captured in their own way.
E. Christopher Clark’s story of going through IVF way back in 2005 is a great read:
Our first wedding anniversary came and went, then our second and our third. There was always an excuse for why it hadn’t happened yet. Your mother was working a job she didn’t like, or I was working a job I didn’t like. Or else it was the both of us at the same time. There were two years when she went back to school for her Master’s degree, and two years where I went back for mine, and those years overlapped to boot. And when we went back to school we continued to work as well. So there was the issue of time. But in the back of our minds there lingered the horrible question: What was wrong?
Brian Moritz’s tale of conceiving is also a wonderful read about his IVF baby:
Funny thing, that pronoun I just used. When my wife and I talk about our experiences, we always use the plural. “We” went through IVF. Because that’s what families do. They go through things together. That’s what being a family means, what being a team means.
But let’s be very clear — “we” didn’t do anything.
My day-to-day life, my body, underwent at worst a minor inconvenience. I had to reschedule a few things at work and school, get up earlier than normal, make a couple of awkward trips to the doctor.
My wife did everything.
[…]
My wife was warned of all the potential problems. She was given an explanation.
Nevertheless, she persisted.
Finally, if video is more your thing, this ~3 minute pregnancy announcement by Reid Wolcott made me cry in the middle of my work day:
Infertility is an extraordinarily difficult struggle, that can make you feel uniquely alone. Let this week remind all of you—those who aren’t parents, those who are, and those who wish so desperately to be—of one thing:
I got news this morning that my friend Jason Seifer had passed away suddenly.
I’m shocked, and really sad.
Jason was like nobody I’ve ever met. Which is an odd thing to say, since we had never actually met in person. Nevertheless, I immediately started to cry upon hearing the news; an odd thing to do for someone who, on paper, was just a voice in my head.
Jason Seifer was one of two co-hosts of one of my favorite podcasts of all time, IRL Talk. He, along with Faith Korpi, were a duo that had both immeasurable and also indescribable chemistry. They were in so many ways the same, and yet in so many ways so very different, I enjoyed every moment of IRLTalk, and its predecessor, Geek Friday.
Let me take a paws to describe a small part of why Jason is so important to me.
Long before I was a podcast host, I was a podcast listener. I got into podcast consumption by wanting to hear what an old childhood friend of mine was doing. Once Build and Analyze started, that led me to Hypercritical, The Talk Show, and most things that Dan Benjamin touched. Including Geek Friday.
Suddenly, there was a podcast with a woman co-hosting. I immediately asked Erin to listen, as I figured she’d be more likely to enjoy a show that was only obliquely about the nerdy stuff I like, but instead about nerding out over anything.
We listened to every episode together, and when Dan left, we weren’t sure what to make of his replacement. This “Jason Seifer” fellow was… a tornado.
It didn’t take us long to fall in love with this rebooted Geek Friday, and things only got better when it eventually became IRLTalk.
I longed for longer car rides with Erin, so we could finally have some time together to listen to IRLTalk. We couldn’t wait to hear what ridiculous pranks Jason pulled, nor what ridiculous puns he would commit to wholeheartedly. I’m still amazed by his long troll of singing George Michael’s Faith to Faith without her even knowing.
Erin and I bonded over IRLTalk, laughing along with Faith and Jason. We were in hysterics the whole time.
IRLTalk exposed Erin to podcasting in a way I was never able to before. It was incredibly convenient not too much later when I started recording my own show with friends.
Though Erin and I were lucky enough to meet Faith in person in 2014, we were
never lucky enough to meet Jason. Nevertheless, Jason and I stayed friends
after IRLTalk ended; including him sending me an utterly preposterous
Christmas card portrait this past year. And this gem, received only last
month, for my birthday on St. Patrick’s Day:

I’m going to miss you, Jason. You brought a unique joy to my life that can never be replaced.
😢
One of my favorite series of blog posts was Swift Diary, written by Brent Simmons while he was learning Swift. He laid it all out there, risked sounding ignorant, but learned a lot. So did all his readers. In many ways, he was an inspiration for this post.
So, too, were my dear friends Myke and Stephen. They’ve been branching out from audio into video for a long time. At first I shrugged it off as just doing what all the Cool Kids™ are doing. Then I saw their videos get better and better, and I couldn’t help but feel intrigued.
Maybe that was feeling left out and left behind—they were moving forward while I was standing still. I wanted to try to do a video or two of my own, but I knew I didn’t want to do a vlog and I didn’t have a museum of old Apple hardware laying around to film. What then?
Last night’s post was the perfect excuse. I wanted to try to make a screencast. I would basically take the time to show, rather than tell, what I was talking about in that post. Twenty minutes later, I had my first screencast. A couple hours later, it was on YouTube.
This video has many problems that I need to fix for next time:
- I’m backlit
- The font in Xcode, Visual Studio Code, and Terminal is way too small
- I’m way too monotone
- I made too many mistakes, because I was talking extemporaneously rather than from some sort of script
- Only after I uploaded the video I realized the audio was only in the
left channel. The linked video is actually the second copy, now with
fixed audio.
- Goodbye, ~50 views and ~3 thumbs up. 😭
I share the above partially to avoid getting that feedback, but also to acknowledge—like Brent did—that I am fumbling along, learning as I go. Hopefully the next video will be better, and the next even better still. For as long as I keep up with it.
I intend to convert my series on RxSwift into one or more videos sometime over the next few weeks. I think that they’re the perfect content for a screencast. After that, who knows. All I know is, this one was fun to make.
I’ve embedded the video below, but it’s best watched fullscreen on as large a screen as you have handy. Please do share any feedback you may have; the only way for me to get better is to learn from my mistakes.