UPDATE 2018-04-02 20:00: Though I used this adapter with a non-Nintendo power supply with Switch software 5.0.0, I’ve heard many reports of these adapters bricking Switches on 5.0.0 and 5.0.1. I can’t tell if this is due to using foreign power supplies, or because of the adapter itself, but, use with extreme caution.
A few weeks ago I was browsing Twitter and saw that Scott Hanselman had posted about the Nintendo Switch over on his blog. Scott’s very informative post details some of the travel accessories he likes to use with his Switch. Among them was the thing I have been waiting for: a portable HDMI adapter.
The Nintendo Switch is magical in that you can… ahem… switch between handheld play and TV play by dropping it into a special dock that comes with the system. The Dock Set is hilariously expensive at $90, but even more egregious is that the dock doesn’t collapse in any way. It’s not particularly heavy, but it’s big. Bringing all that along with me when I travel is not fun.
However, the Switch’s one port (sound familiar?) is a standard USB-C port. So, when I first got it, I tried to use my USB-C → HDMI adapter that I use with my MacBook. No dice. I had assumed that there was some sort of “DRM” within the dock that allowed only it to output HDMI.
Scott found what I was looking for: a USB-C → HDMI adapter that works with the Switch! I just got one, and confirmed that it does work on my TV at home with my Switch (software version 5.0). Moreover, the dongle works great with my MacBook, even having a more reliable USB-A connection than my previous adapter.
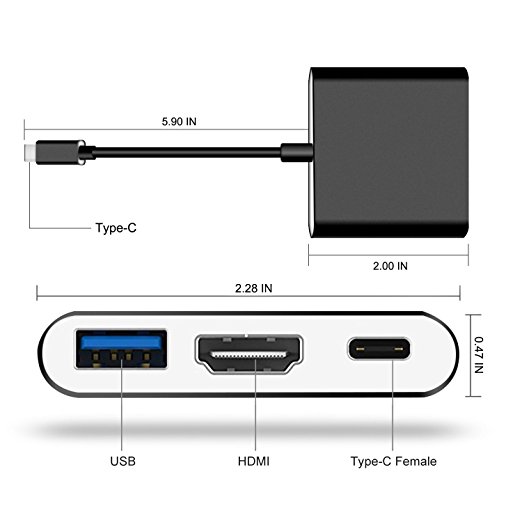
Now, I can replace my previous adapter with this one, and use that with either my MacBook or my Switch. I can plug my Switch into, say, a hotel room TV without having to worry about bringing the entire dock. Moreover, the Apple 29W USB-C Power Adapter seems to be enough to power the whole setup.
Now, who wants to play Mario Kart?
This week I joined Sam and Dan on their wonderful car-themed podcast Wheel Bearings. We discussed the Stelvio Sam and I tested, what it’s like to test a Giulia Quadrifoglio in a foot of snow, the ridiculously named Mini Cooper S E Countryman ALL4.
After discussing cars we’d been driving, I have a bit of a mea culpa about Volvo’s Sensus system. We round out the episode with some pipe dreams from Dan and myself about potential future cars.
As I’ve said before, Wheel Bearings is like Neutral, but by people who actually know what they’re talking about. If any part of you liked Neutral, you’re sure to love Wheel Bearings.
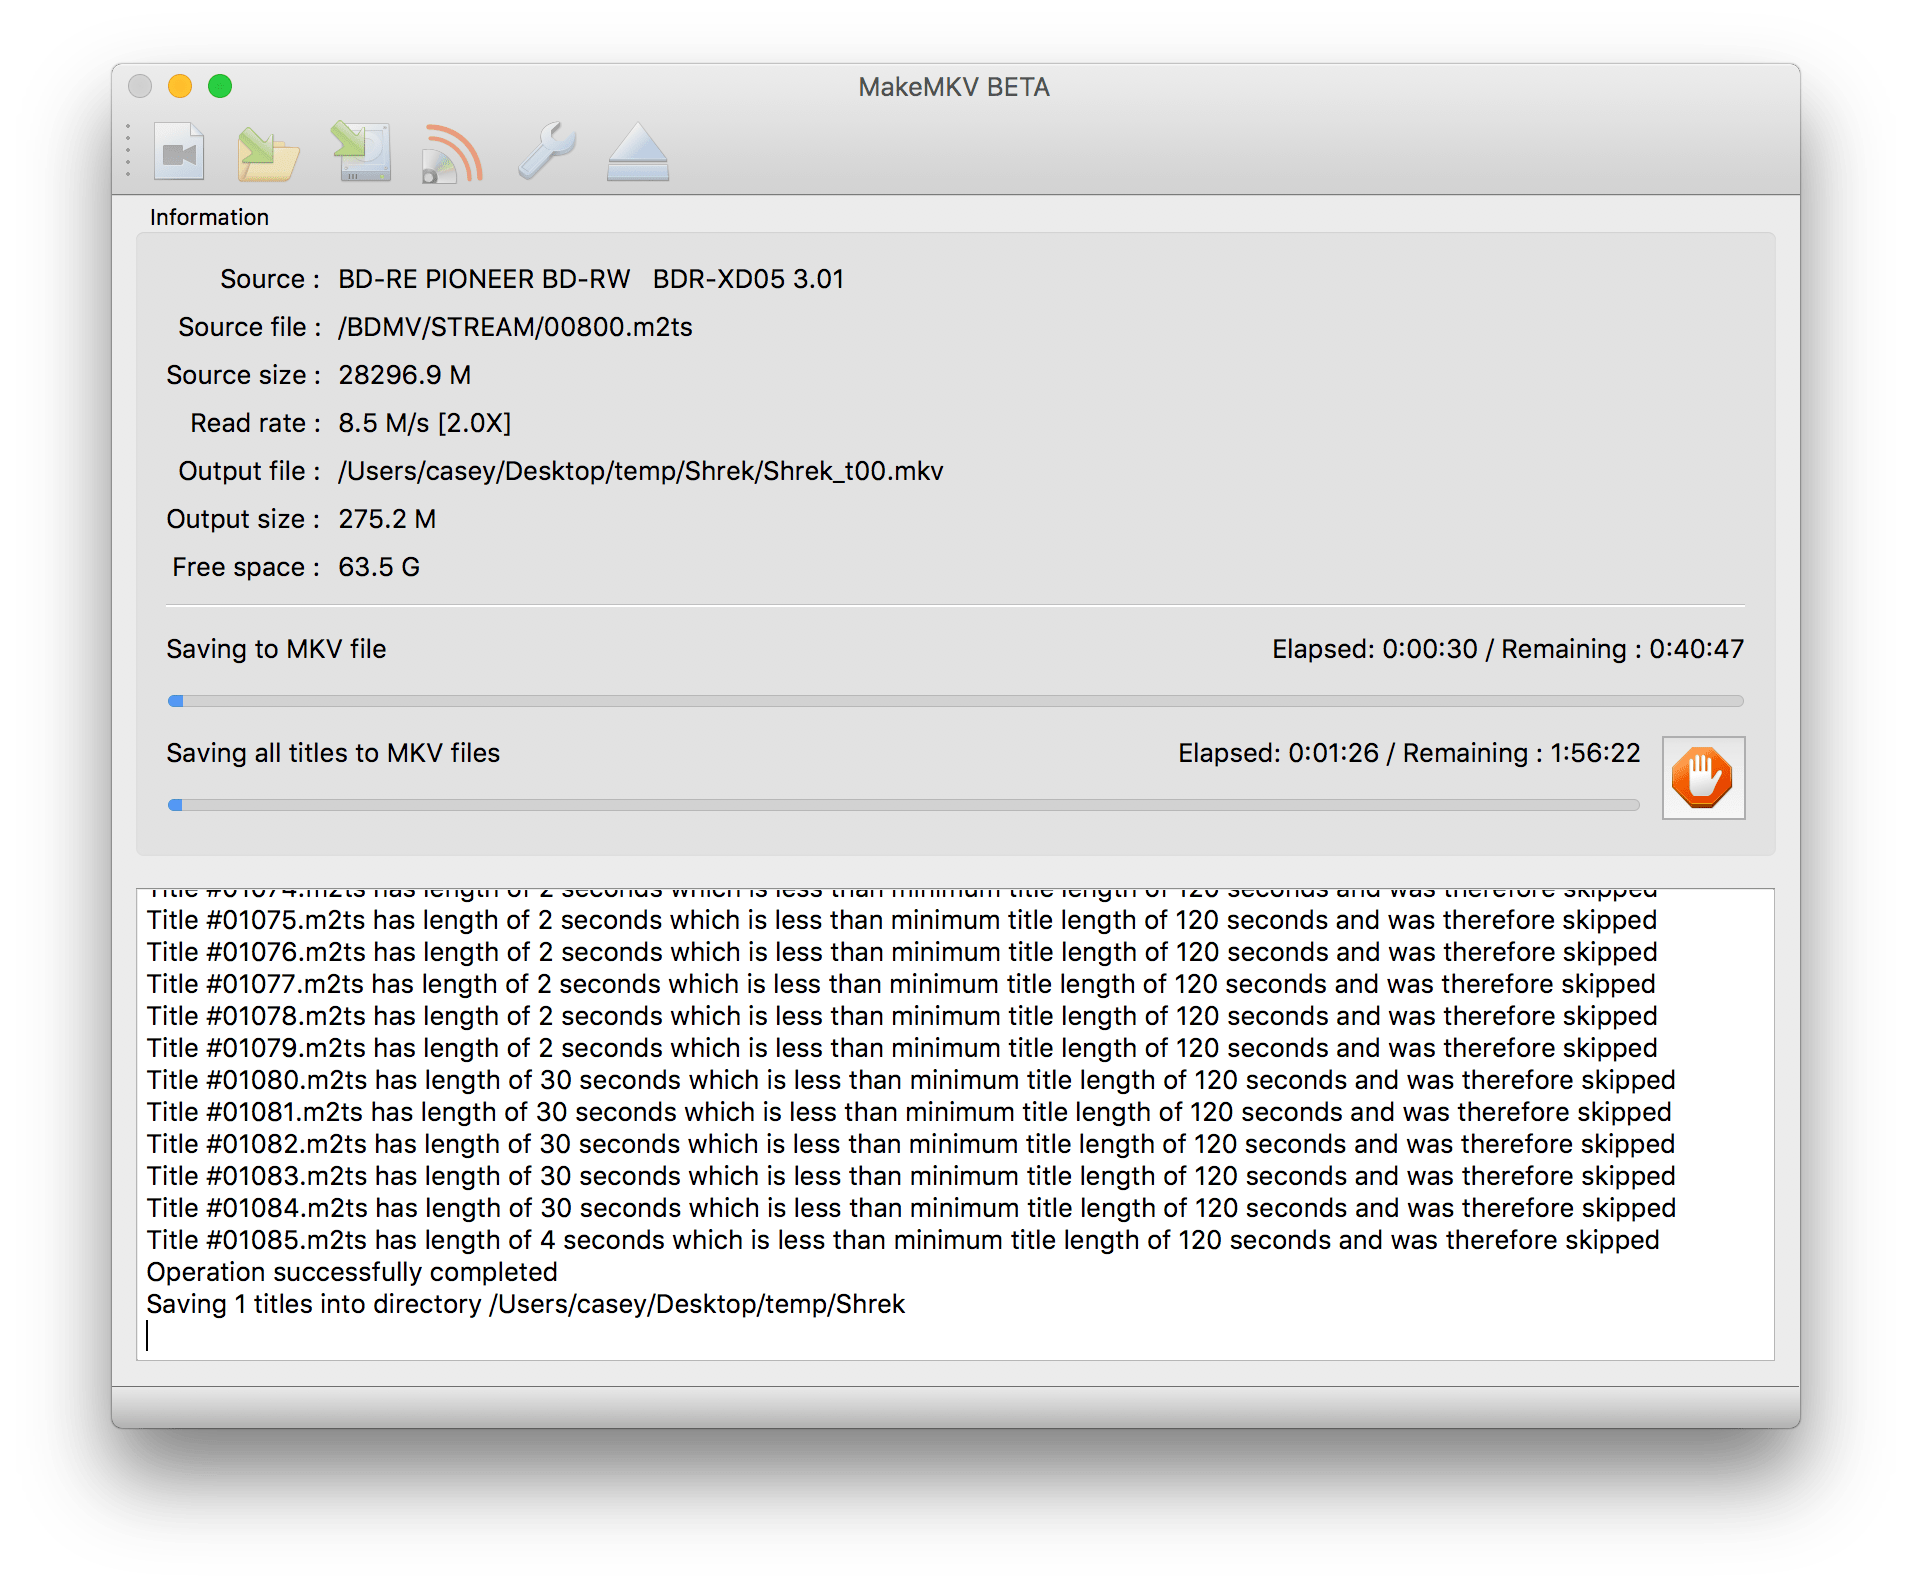
It all started when I was ripping a BluRay:
I have a 1 TB iMac. I should not be running this low on space.
Things were, alarmingly, confirmed in the terminal:
casey@iMac ~> df -h
Filesystem     Size   Used  Avail Capacity
/dev/disk1s1  932Gi  866Gi   65Gi    94%
Only 65GB free‽ This is a problem.
Whenever I need to diagnose what’s going on with free space, I turn to DaisyDisk. It is my preferred way to drill into where space is being consumed.
Unfortunately, outside of some very large iPhone backups, nothing was out of the ordinary. Until I noticed this:

Something is amiss.
Having learned from my HFS+ days, I thought I should try to do First Aid using Disk Utility. I even went so far as rebooting in recovery mode and performing First Aid there. (Old HFS+ habits die hard.)
However, even after a recovery, Disk Utility had no good news for me:
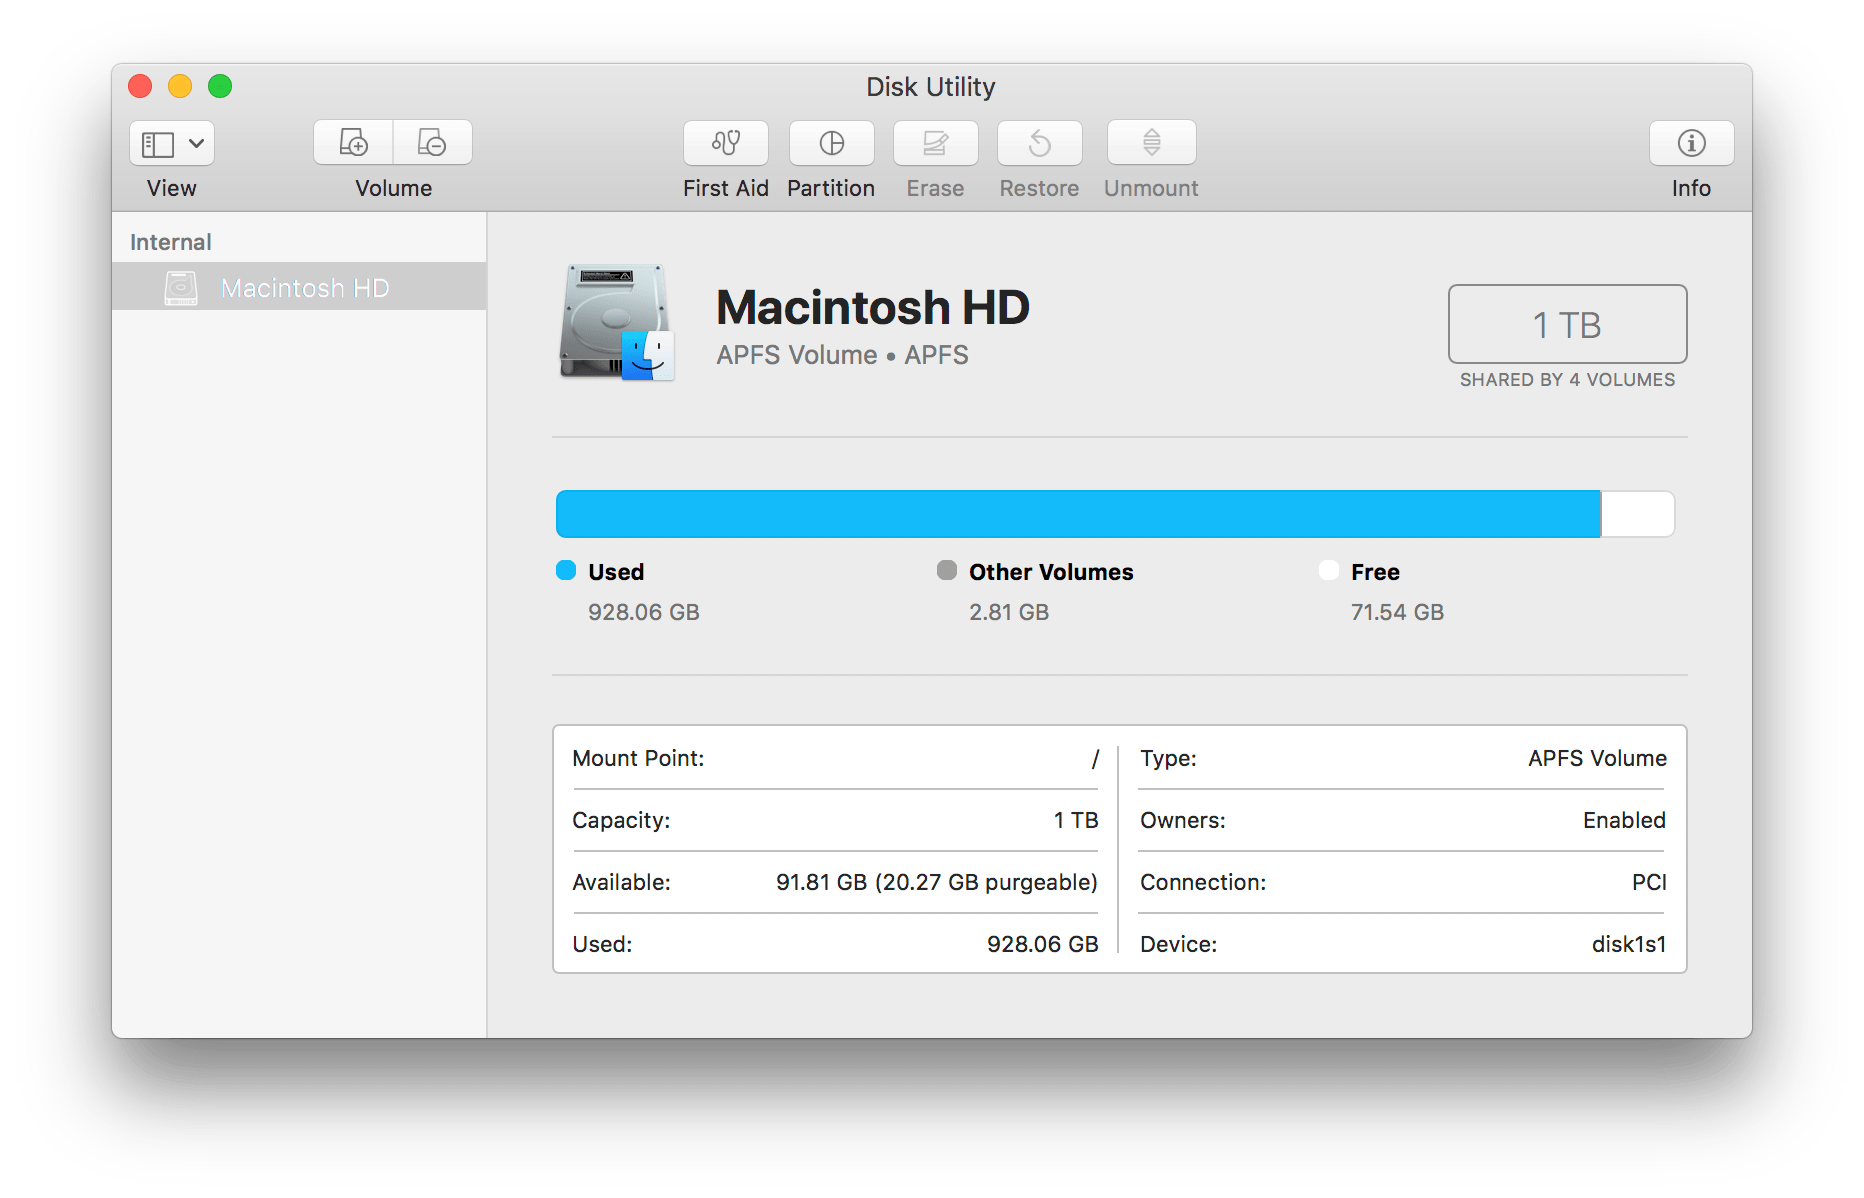
In speaking with the oracle about this, he led me in the right direction: the issue is APFS and its snapshots.
In short, snapshots allow for the entire filesystem’s state to be marked. This could allow a user to easily and quickly throw away subsequent changes and roll back to a prior state. This is particularly useful if an OS update is attempted but fails; you can quickly go back in time to the way things were before the update was attempted.
The way to determine what snapshots are around is to use tmutil.
This tool covers more than just snapshots, but with the listlocalsnapshots
option, can show us what snapshots are around:
casey@iMac ~> tmutil listlocalsnapshots /
com.apple.TimeMachine.2018-02-17-105420
com.apple.TimeMachine.2018-02-17-115852
com.apple.TimeMachine.2018-02-17-131024
com.apple.TimeMachine.2018-02-17-141820
com.apple.TimeMachine.2018-02-17-152954
com.apple.TimeMachine.2018-02-17-170922
com.apple.TimeMachine.2018-02-17-182143
com.apple.TimeMachine.2018-02-17-201534
com.apple.TimeMachine.2018-02-17-214625
com.apple.TimeMachine.2018-02-17-231950
com.apple.TimeMachine.2018-02-18-015522
com.apple.TimeMachine.2018-02-18-060124
com.apple.TimeMachine.2018-02-18-070848
com.apple.TimeMachine.2018-02-18-093121
That’s… a lot.
Curiously though, Finder showed me some good news:

What. The. What.
I decided to take a step back and do a little research about the problem online. Eventually that led me to this Apple support document (emphasis is mine):
Snapshots older than 24 hours are automatically deleted. And to make sure that you have storage space when you need it, snapshots are stored only on disks that have plenty of free space. When storage space gets low, additional snapshots are deleted, starting with the oldest. That’s why Finder and Get Info windows don’t include local snapshots in their calculations of the storage space available on a disk. That’s why Finder and Get Info windows don’t include local snapshots in their calculations of the storage space available on a disk.
Aha!
Lesson learned: Do not trust anything but Finder to tell you how much free space you have on an APFS formatted drive.
Given the dates on those snapshots above, I expect they will be cleaned up in the next couple days, and everyone will agree that I have a ton of space remaining.
UPDATED 2018-02-18 8:30 PM: Other than snapshots, there is another kind of free-but-not-really-free space in Sierra and beyond: purgeable space. This is space that has things that may, for example, also exist in iCloud. Should Apple decide your local device needs the room taken up by these local copies, it will automatically (hopefully) delete them. Jason Snell has a great writeup at Six Colors that covers all this.
This week I returned to Clockwise, joining Aleen Simms, Dan Moren and Mikah Sargent. We discussed essential travel tech, romantically technical (or perhaps, technically romantic?) gestures, technology disappointments, and the HomePod.
Clockwise is always fun to listen to and hugely fun to appear on. As I say every time, if you haven’t tried it, you really should.
I have some questions.
- Where does the money come from to buy firearms for these teachers?
- Where does the money come from to buy ammunition for these teachers?
- Where does the money come from to train these teachers?
- How much training is required?
- Who is doing the training?
- How are the trainers compensated for their time doing the training?
- Given most taxpayers won’t give money to cover basic school supplies[1], what makes you think they’ll be willing to give money for firearms?
- How much ammunition does a teacher get rationed?
- Can they bring in their own firearms? Their own ammunition?
- How do we regulate their own firearms, ensuring safety, adequacy, etc?
- Where do the guns get stored? How do we prevent children from getting them?
- If they’re in a safe, doesn’t that defeat the point? Couldn’t that be a life-or-death delay to access them?
- If they’re holstered, what if a teacher’s clothing doesn’t permit wearing a concealed holster?
- If they’re holstered, what if a teacher doesn’t want to open carry?
- If they’re holstered and open carried, how does a teacher ensure that an angry student doesn’t take their firearm?
- Actually, that’s true no matter where the gun is.
- If the gun is in a safe, who has the key?
- If it’s a combination, what happens if the teacher forgets the combination?
- If there is a master key, like there is for classrooms, who holds the master key?
- What if the master key is compromised?
- What if one or more teachers doesn’t have a particular affinity for the idea of shooting a student?
- Are teachers allowed to shoot first? Or only after they hear gunfire?
- As the husband of a teacher, I can assure you that teaching is one of the most stressful, thankless, and unfairly compensated jobs in the world. How do we prevent a teacher from losing their cool one day and using their firearm, unprovoked?
- What if a teacher is the one doing the shooting, since, you know, they have a gun at their side at all times? How can other teachers know if the first teacher is firing in self-defense or in an act of aggression?
- Regardless, how do teachers know who the good guy is, and who the bad guy is? How do we ensure there’s no friendly fire?
- What if the bad guy is surrounded by hostages? Are they expected to engage anyway?
- What happens if a student is in a hallway between two teachers’ rooms? Who shoots? How do they avoid friendly crossfire?
- If Chris Kyle, a highly trained marksman, and good guy with a gun, was gunned down in a shooting range, surrounded by other good guys with guns… what makes you think an (at best) amateur marksman will fare better?
- What if it’s… stay with me here… maybe not a good idea to put more guns into society?
- What if having hundreds of guns in a single building is… bear with me now… not a great fucking idea? What if that building was filled with our children? Doesn’t that make it… an even worse fucking idea?
- What if we’re… I dunno… not terribly comfortable with training our teachers how to quickly and effectively kill our children? (This one was stolen from Twitter)
Additional questions from and inspired by Andrew Leahey, via Twitter:
- What if the perpetrator is only threatening to use a gun? What’s the rules of engagement?
- What about a fight between students? Can the teacher escalate? What if one of the students has a knife?
- Do janitors, administrators, guidance counselors, all get firearms?
From and inspired by Michael Smith:
- Who pays for lawyers after an incident occurs? What if the gun is a personal one and not a school-issued one? Is the teacher responsible for their own defense, or does their city/county/state have to pay to defend them?
Once you guys have answers to all of these, let me know.
Thanks in advance.
I grew up in an extremely affluent county in Connecticut. When I was in high school, we used donated paper from the Danbury Hospital Radiology Department from about March until the end of the year. Because we couldn’t afford paper anymore. Because the repeated votes to increase our taxes were voted down. Every time. By rich people. ↩
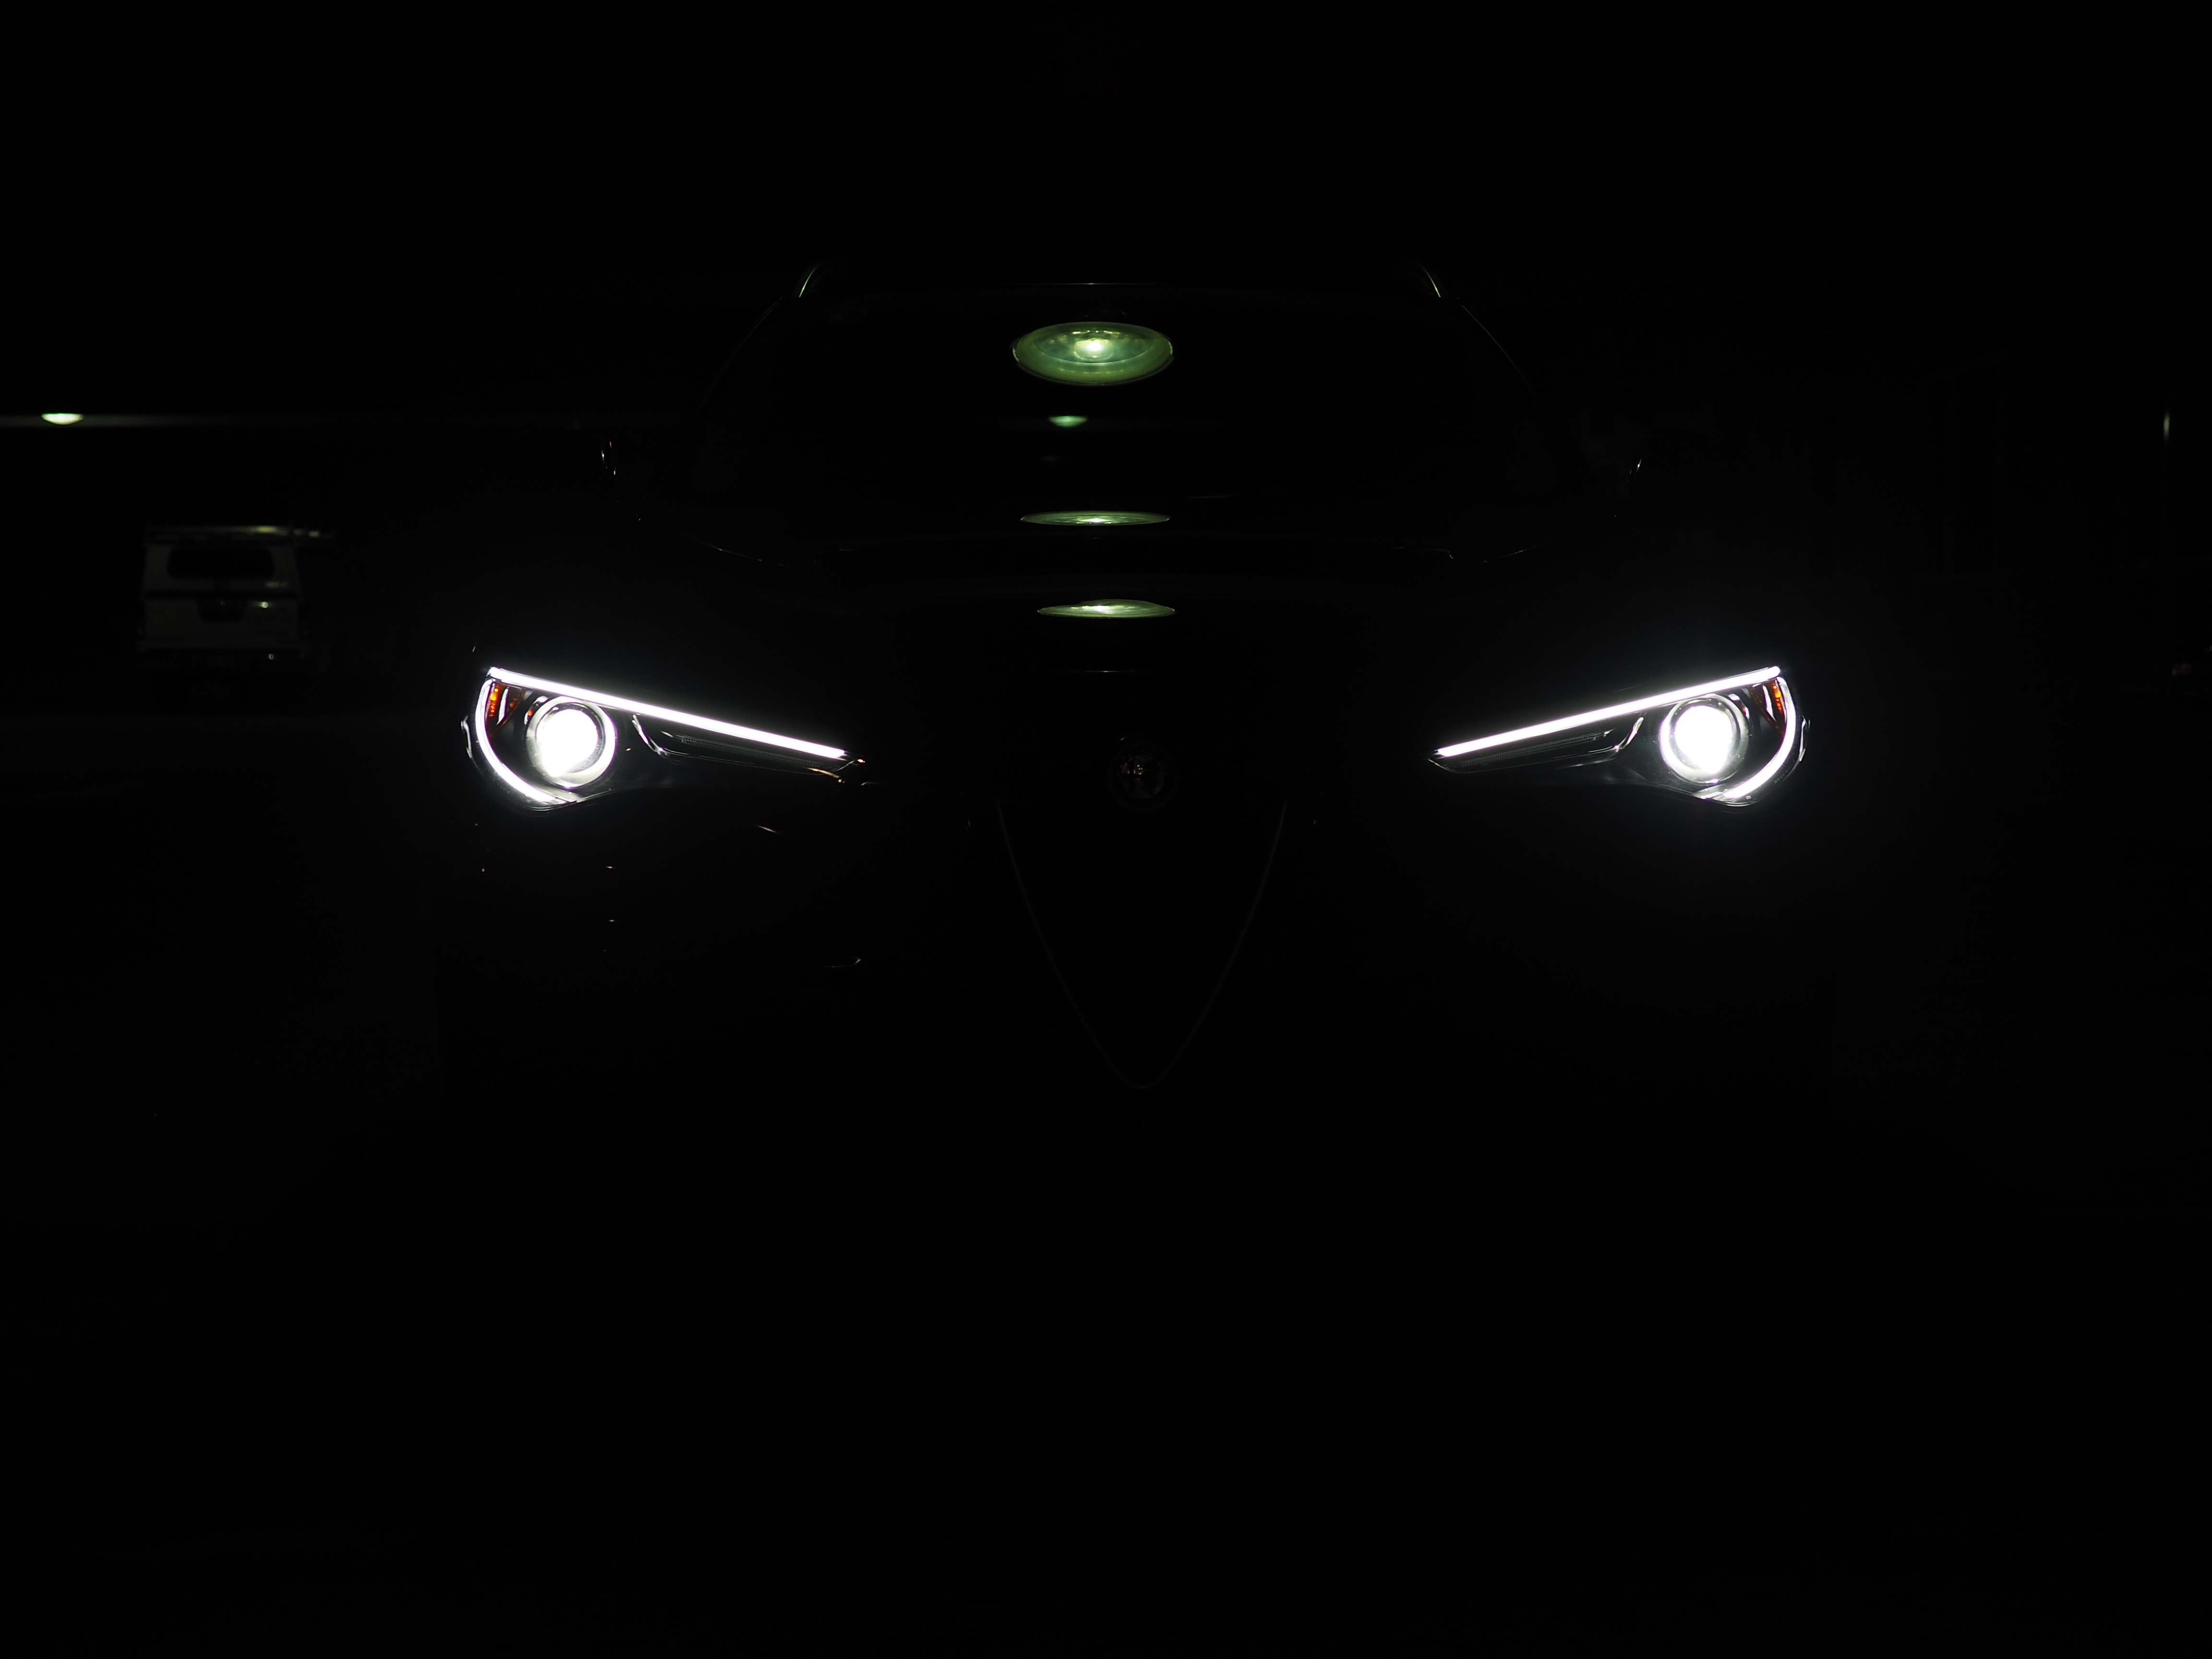
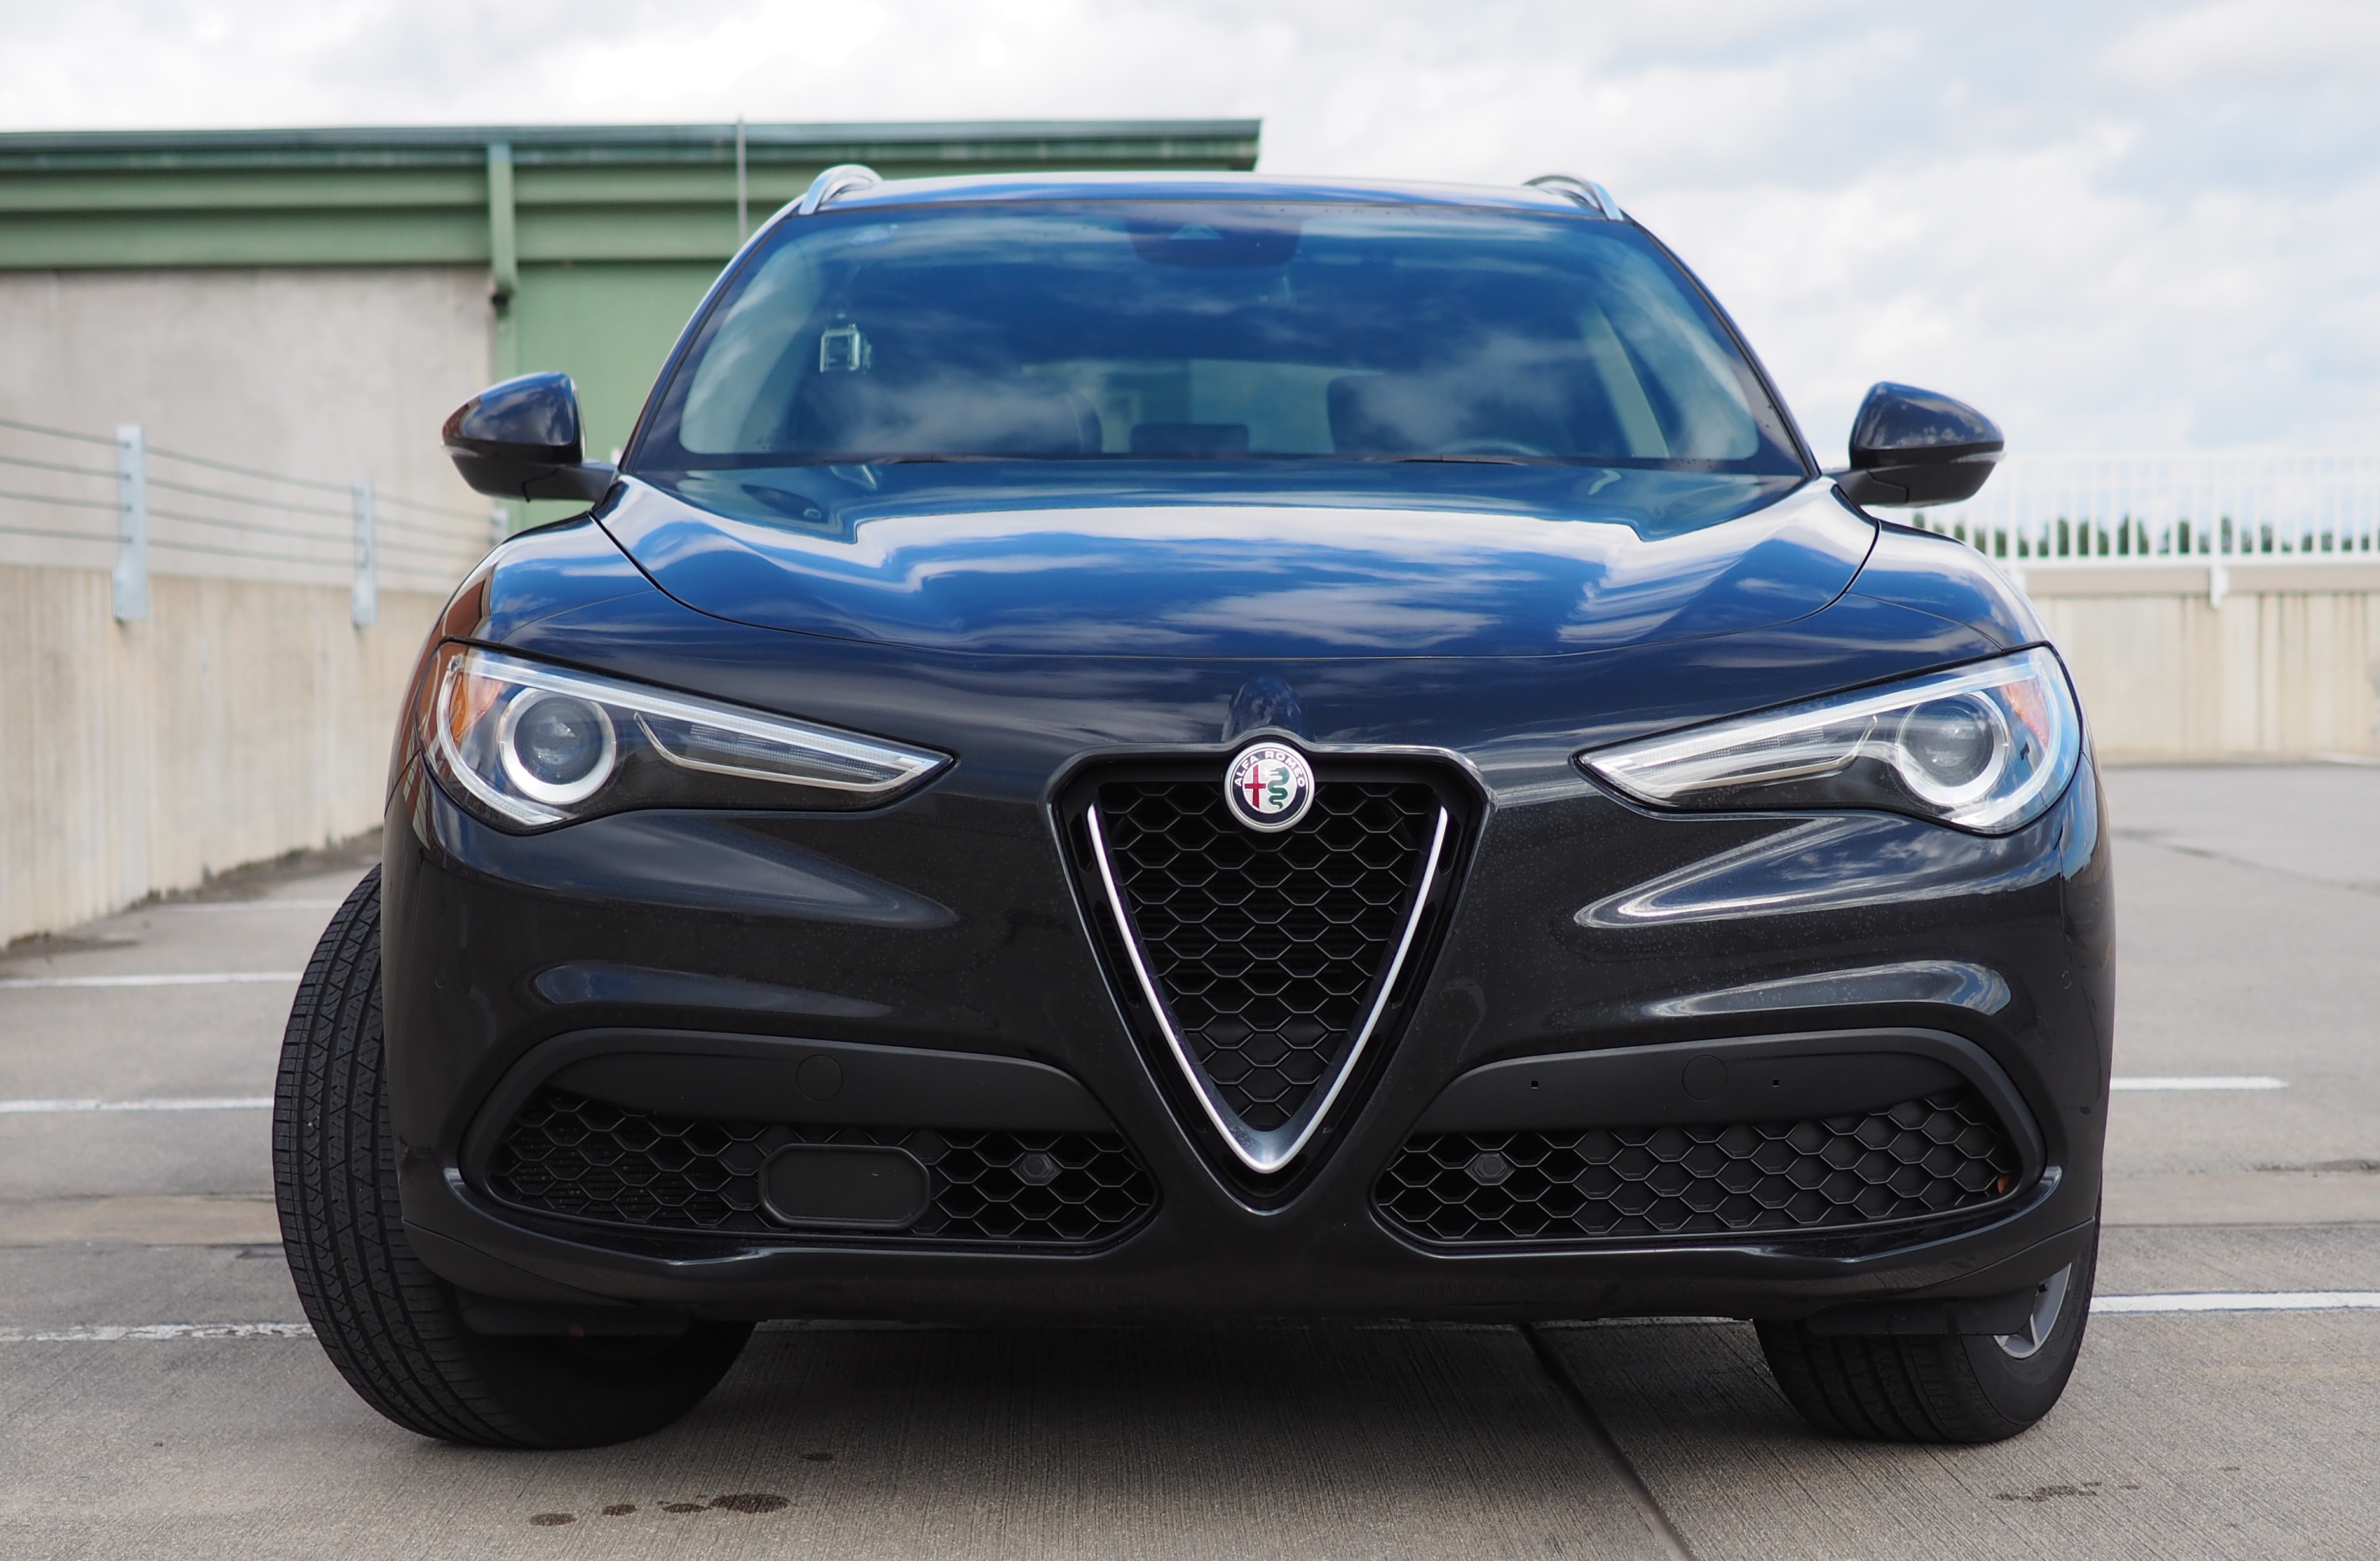
Despite being a bit overwhelmed lately, I wasn’t about to pass up on the chance to take a week-long spin in another Alfa Romeo. Before, it was Alfa’s hot rod sedan. This time, I was able to get seat time in their SUV, an Alfa Romeo Stelvio Ti.
Video
As with last time, I’ve put together a short video about the Stelvio. I’m pretty pleased with how this turned out; I’ve (mostly) sorted out my audio issues and have learned some new tricks. Just like last time, I’m happy to hear any constructive feedback that you may have, if you’re intersted in sharing.
An Alfa Romeo… SUV?
Indeed. Take the Giulia that I tested a few months ago, lift it up, and hope for the best. Much to my surprise, most of these hopes were answered; the Stelvio was a stunningly passionate drive for what it was. SUVs are not supposed to be this, well, zippy.
The Stelvio’s ~300 HP would be a lot for a sedan, but doesn’t seem particularly overwhelming for a heavy, all wheel drive SUV. However, once the Stelvio’s turbocharger started to make boost, it was surprisingly adept at getting out of its own way.
Most surprisingly was the Stelvio’s sure-footedness on the road. Upon closer inspection, I shouldn’t have been so surprised. The Alfa Romeo isn’t the only thing named Stelvio: it bears the name of the Stelvio Pass. Avid Top Gear nerds may be scratching their heads right now, as this should sound familiar. The Stelvio Pass was — 🚨 SPOILER ALERT 🚨 — named by Top Gear as the best driving road in the world.
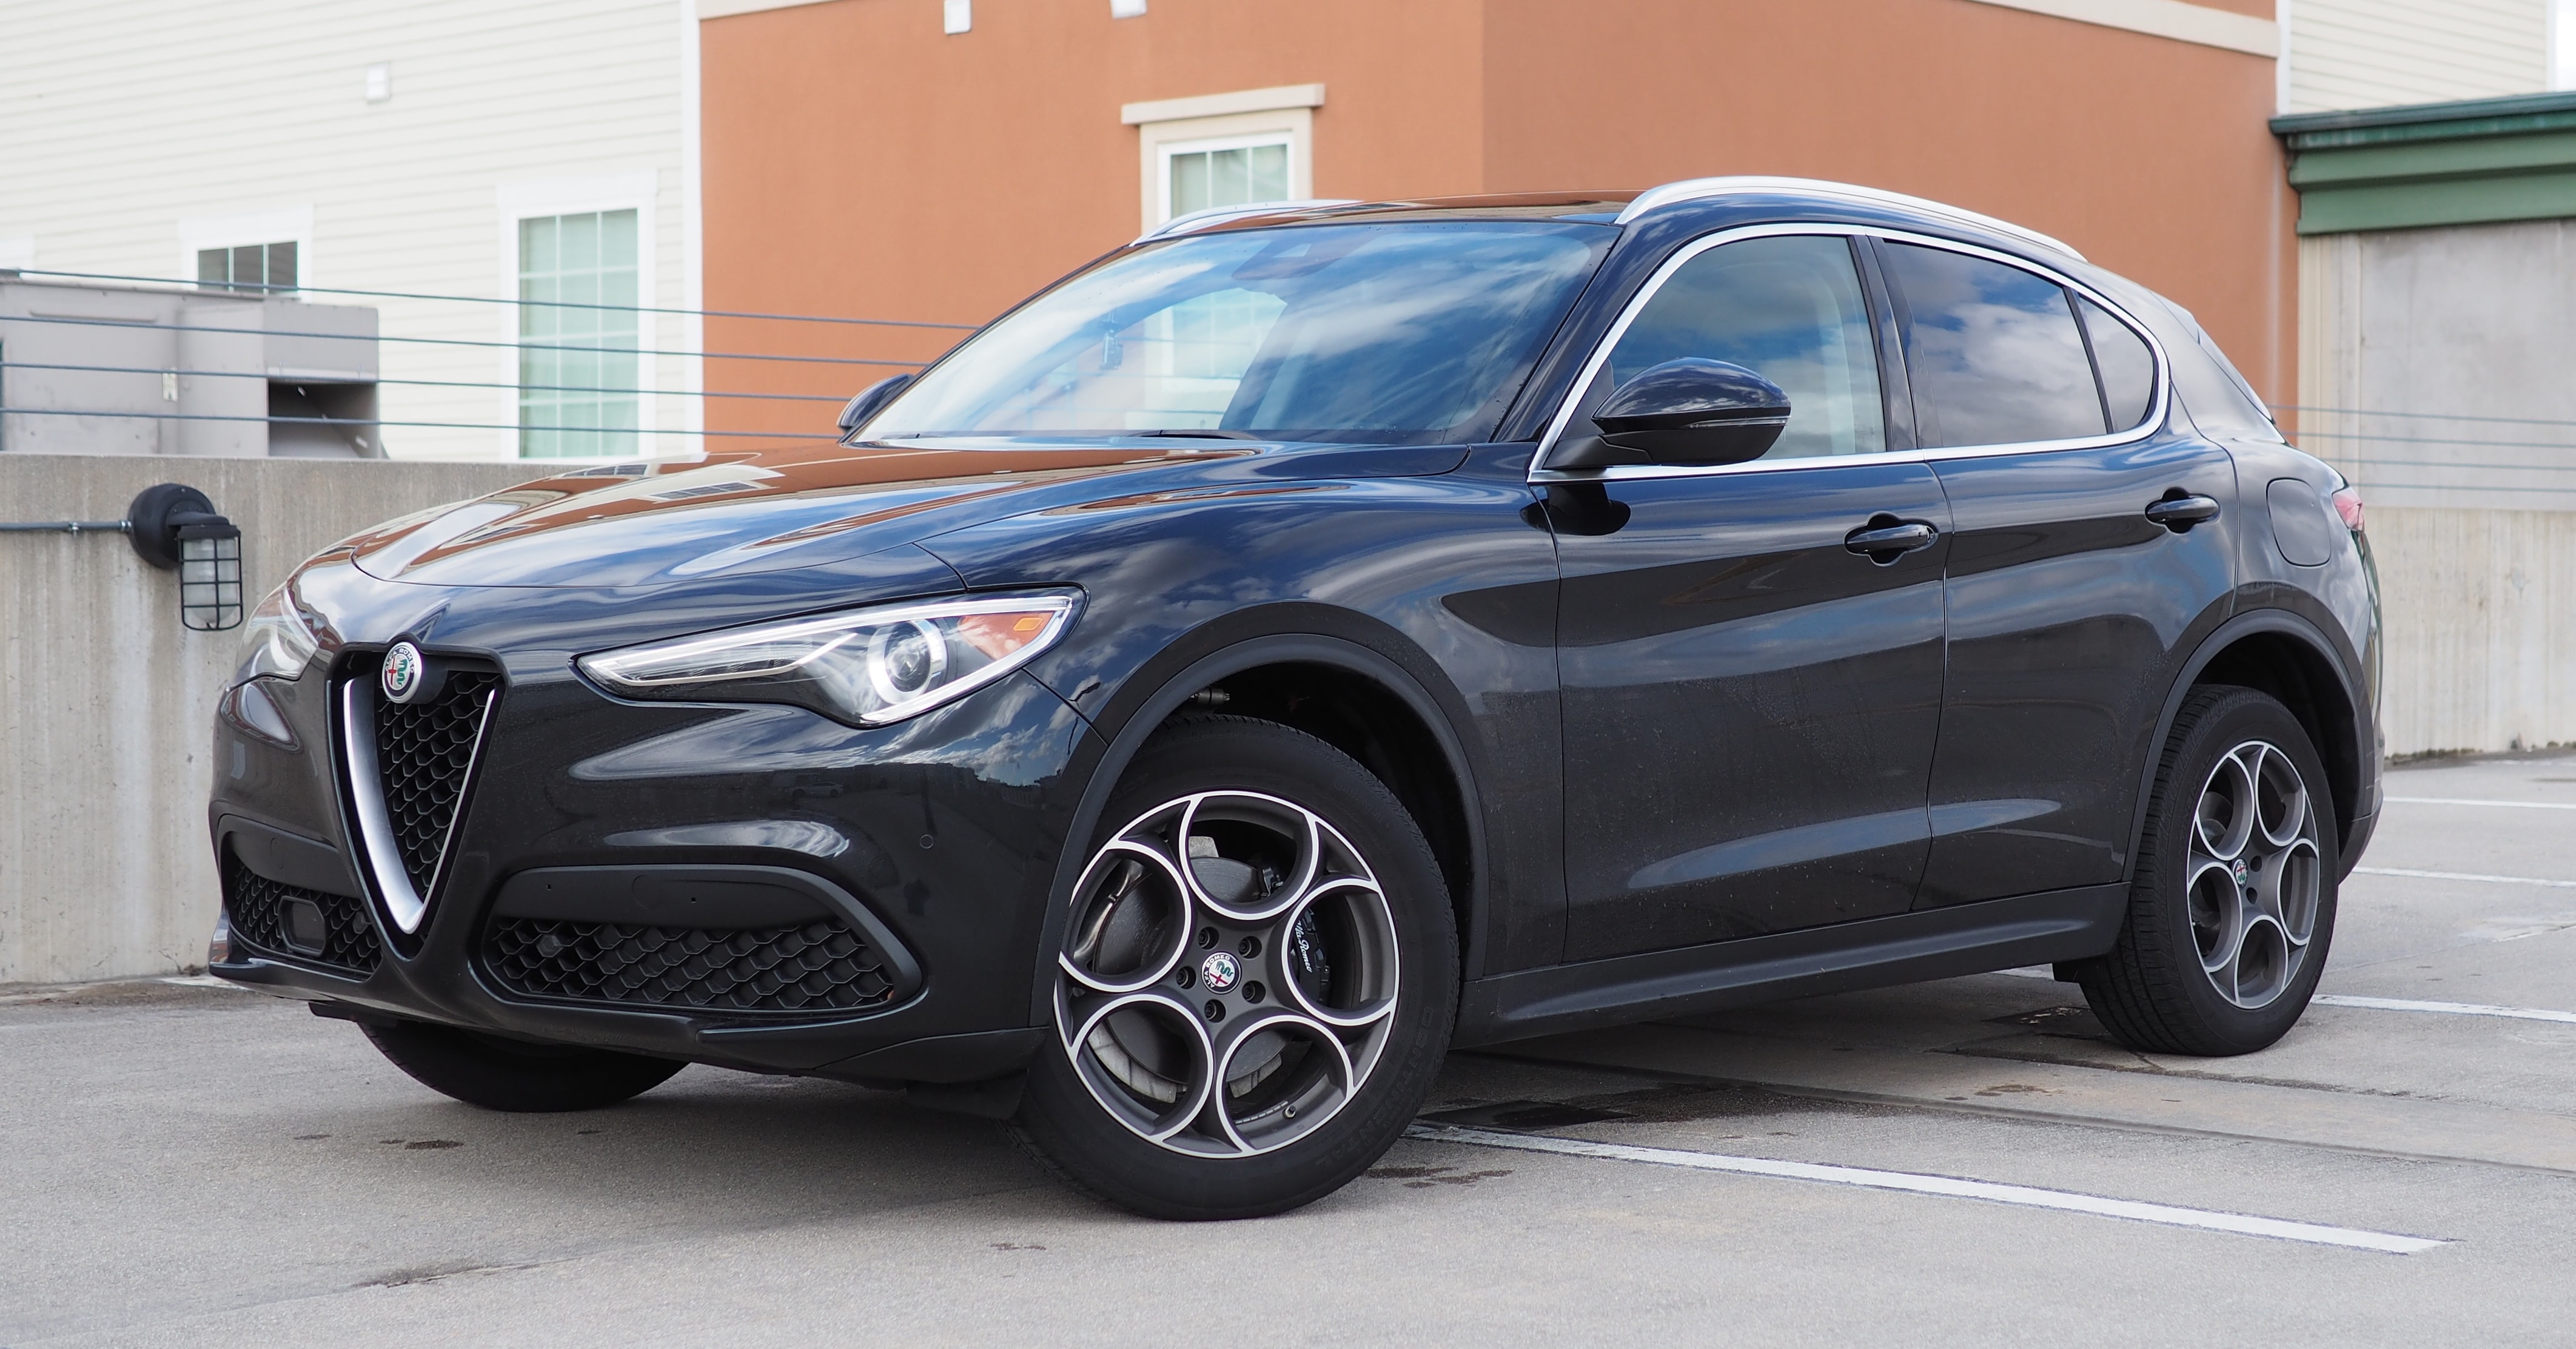
The Stelvio handled extraordinarily well given its height. I never felt like the center of gravity was at waist level, as I do in most other SUVs I’ve driven. In the Stelvio, I felt like the center of gravity was at the floorboard at worst. Body roll was virtually nonexistant.
All of this led to the Stelvio being a very confident drive. Generally speaking, I was only ever-so-rarely reminded that I was driving a tall SUV; left to its own devices my brain’s autopilot computed turn-in speeds roughly equivalent to my BMW sedan.
One of the slogans for the Stelvio is The SUV for the S-Curves. As 🙄 eye-roll-inducing 🙄 as that may be, it proved to be absolutely true.
Interior
The interior in so many ways felt extremely similar. There were a few small changes on the inside, some of which were really wonderful.
Most notably the substitution of a truly lovely dark oak trim in lieu of the standard-issue hot-rod carbon fiber from the Giulia Quadrifoglio. I can’t speak highly enough of this oak trim; it lent an air of sophistication to the Stelvio that a traditional dark wood trim would not have. Perhaps this is my bias against brown woods showing, but that oak was my favorite interior trim ever.
Additionally, the panoramic sunroof was nice. I dearly missed having a sunroof in the Giulia Quadrifoglio. Many of my friends prefer “slicktops”, but to me, a car without a sunroof is not a car I want to own. The Giulia got a pass thanks to its tremendous drivetrain; the Stelvio would not have.
Thankfully, the sunroof is there, and it’s huge. I was surprised by how little it would actually open — most of the sunroof area was non-moving glass. However, it was enough, and the powered sunshade was a really lovely compromise of light-permitting but not light-emitting.
Second only to the oak trim, I also really loved that there was a smartphone “holster” between the cup holders. You can see this in my video, and it’s one of those great ideas that’s obvious in retrospect. It’s frustrating in my car that I don’t have any particularly good place to lay my phone; the upright holster between the cupholders in the Stelvio was perfect, and damn clever.
Well Actually
The as-tested price for my borrowed Stelvio was around $55,000. Not an entirely unreasonable sum for a modern, zippy, European SUV. However, there were some features that I felt should absolutely have been in this price bracket, but were missing:
-
CarPlay and/or Android Auto
(I should note it appears these are coming very soon) -
A birds-eye-view parking camera
-
Autonomous driving features
-
Remote control via smartphone app
(Though the Stelvio did have a remote start button on its keyfob)
Some of these features can be had in entry-level economy cars for little-to-no extra money. To see them missing from a car that’s north of $50k is more than a bit frustrating. Perhaps not a do-or-die issue, but it was enough to give me pause.
Conclusion
I’m not a SUV kind of guy. I like my cars low, fast, and reasonably small. The Stelvio, however, was very much the spiritual equivalent of that very set of traits. It was not huge, but not small. It was quicker than expected, if not outright fast. It handled stunningly well for a car as tall as it is.
So who is the Stelvio for? To my eyes, it’s a great car for someone who would generally consider a BMW X3, but wants something, well, interesting. Perhaps you fancy yourself a connoisseur. Or maybe you just like to think different. Assuming modern Alfa Romeo can put behind the reliability gremlins of its past, the Stelvio is certainly an interesting choice, if nothing else.
A little over three years ago, I wrote about the moment when Declan was placed on Erin’s chest for skin-to-skin, shortly after his birth. In one very lucky picture, I was able to capture the most pure expression of euphoria on Erin’s face.
Then, we were first-time parents. Now, we’re new parents again; this time, because of Mikaela. Though we’re not first-time parents, we’re now first-time parents of siblings.
I had been excited for Declan to meet Mikaela for months before she was born. I didn’t know what was going to happen, but I had a feeling it was going to be pretty special.
Erin took this shot of me wiping away tears as I watched Declan hold Mikaela for the very first time. Much like Erin when Declan was placed on her three years ago, this was my moment. This was my euphoria.
Parenting a toddler and an infant is already proving to be challenging in a litany of ways neither of us really expected. It’s already exhausting. Nonetheless, we are extremely lucky. We have had two children — both through absolute miracles of science — after assuming that we would never be able to have even one. Even when it’s frustrating, life is good. In this particular moment, life was amazing.


Mikaela Charlotte Liss. Born very early on Thursday morning. She weighed in at 9 pounds, 10.5 ounces and was 21 inches long.
Mom and Mikaela are doing well. Her older brother is still feeling things out, but has been considerably more positive than not.
I’m fulfilled. Somewhere deep down, even after Declan, I knew our little family wasn’t quite complete. Now that Mikaela is here, I am — and we all are — whole.
This week I returned to Clockwise, joining Lory Gil, Dan Moren and Mikah Sargent. We discussed wishes for Apple for 2018, personal tech stories from the holidays, apps that delight us, and running virtual machines.
If you’ve somehow missed out on Clockwise, you’re doing yourself a disservice. Clockwise is a fun and fast-paced show, that never lasts more than a half hour. Even the most busy podcast listening schedules can — and should! — be able to squeeze Clockwise in.
When the Apple Watch Series 3 with LTE was first announced, the LTE service was advertised as “10 dollars per month”. This has turned out to be, well, sorta true. At least, on AT&T.
The first full month of Apple Watch ownership, I looked at my bill and noticed—to my horror—that the “$10 per month” was not inclusive of fees and charges. Since the Watch has its own cellular line, it has a plethora of these fees. So many of them, in fact, that my first full month’s bill was $17. I lamented this on ATP (Overcast timestamp link) when it happened.
I didn’t want to make too big a stink about it, because it was the first full month’s bill, and I wasn’t sure if it was really indicative of the true cost. Having waited a few months now, the last couple of watch bills have indeed leveled out.
AT&T charges me $14.19 per month to have LTE service on my Apple Watch in Virginia.
Here’s the relevant excerpt of my bill:
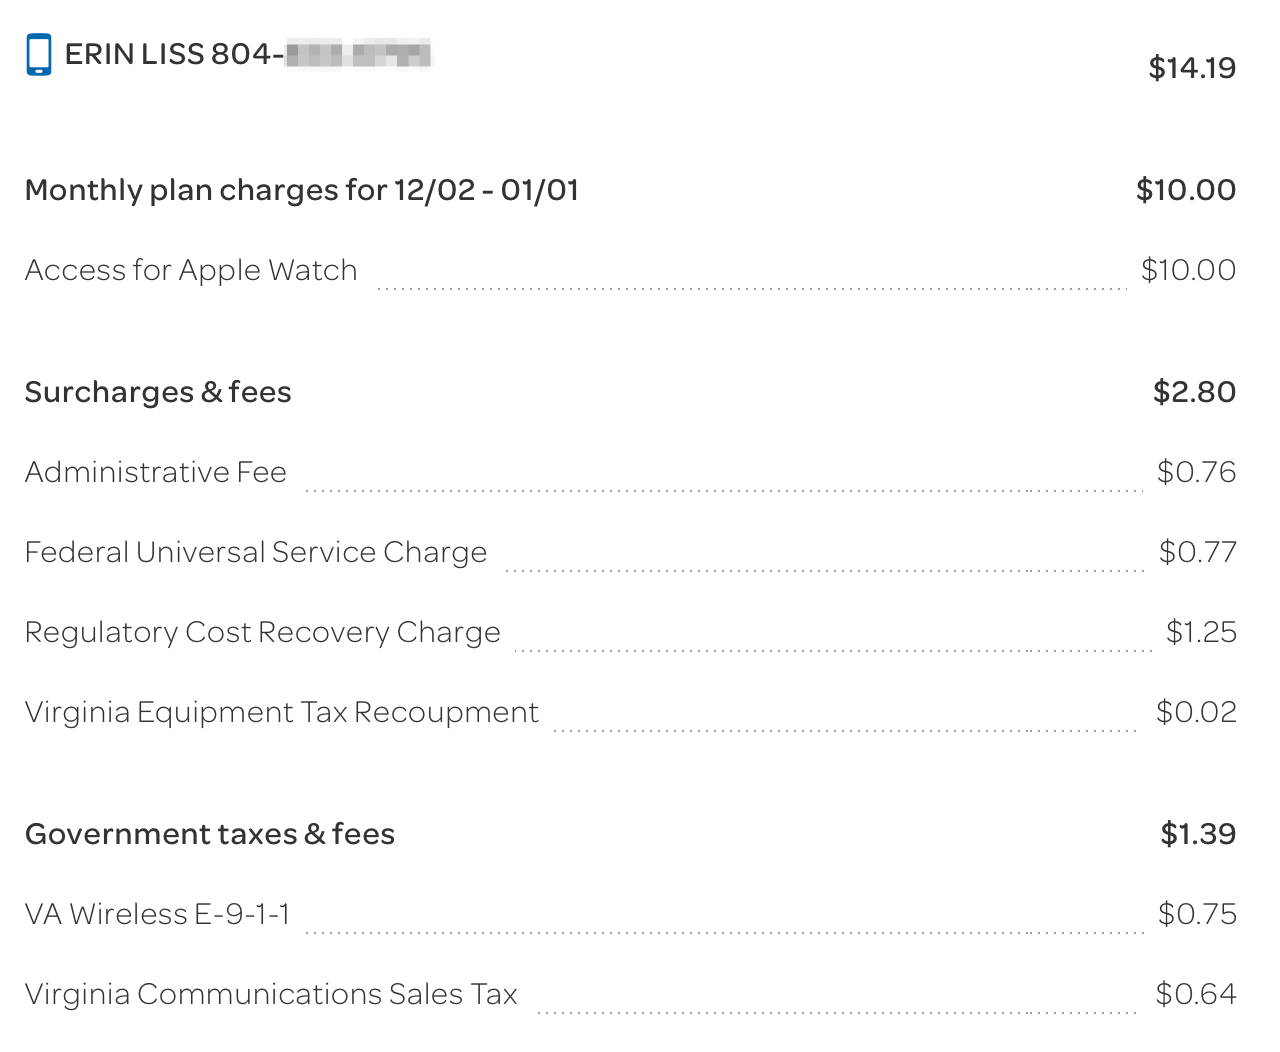
This is really preposterous. My understanding is that other carriers, such as the self-proclaimed “uncarrier”, T-Mobile, charges exactly $10/month. It would appear they just take earnings on whatever is remaining of the $10 after taxes and fees. Naturally, the customer-hostile AT&T does no such thing.
These unspoken-for fees really piss me off, and though I understand that these are AT&T’s fault, it’s hard not to feel like Apple sold me a bill of goods but didn’t end up really delivering. Having re-watched the keynote, Apple was smart enough not to say anything specific about pricing during the event, but the dim-witted consumer in me didn’t remember it that way.
I friggin love my Apple Watch Series 3, and I friggin love going for jogs with just my Watch and AirPods. It’s really game changing. But it does chap my ass seeing this AT&T bill every single month.